This guide will help you understand how to use the Solver add-in program for what-if analysis in Microsoft Excel.
We can take advantage of the Solver to find an optimal value for a formula given specific constraints.
Table of Contents
The Solver tool changes values on specific cells in your sheet to maximize or minimize a certain formula.
Let’s take a look at a simple example of a scenario where we can use the Solver tool.
Suppose you have products that you are planning to sell. Each product requires a certain amount of capital to purchase and can net you a certain amount of profit.
What is the optimal strategy to earn the most profit given a certain budget?
With the Solver add-in function, we can determine how much product we’ll add to our inventory to maximize earnings. The Solver add-in can help replace tedious trial-and-error.
You should now have an idea of when it may be useful to use the Solver add-in function. In the next section, we’ll provide a sample problem that can be solved using this add-in.
A Real Example of Using the Solver in Excel
The following section provides a basic example of how to use the Solver in Excel.
First, let’s take a look at a real example of the function being used in an Excel spreadsheet.
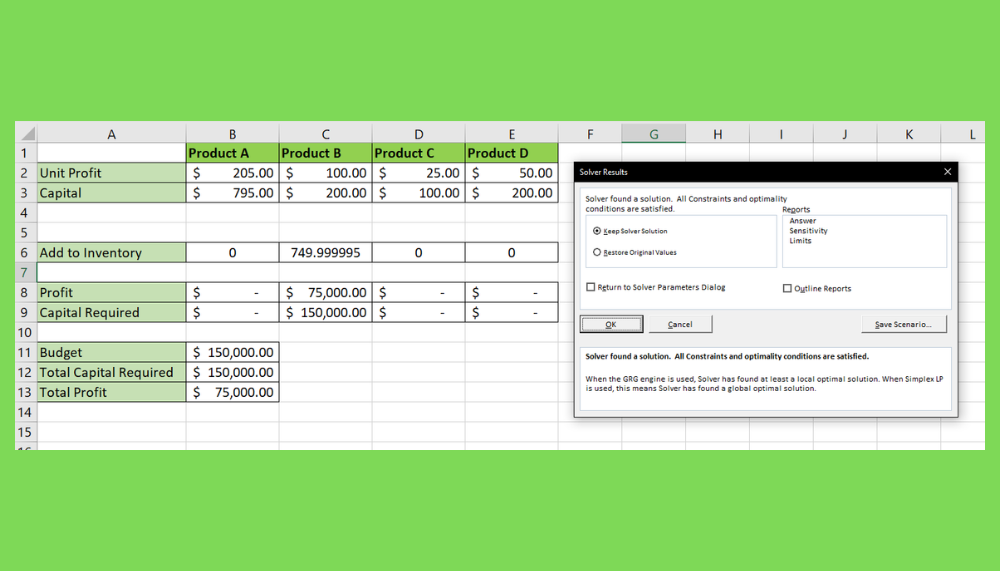
The spreadsheet below calculates the total potential profit given a certain number of products added to the inventory. For example, if we order 100 of each product, we can earn a total profit of $38,000 while still being under budget.

Using the Solver add-in, we can arrive at a more optimal solution. We can use our entire budget to buy 750 units of Product B. This will give us the maximum possible profit of $75,000.

Do you want to take a closer look at our examples? You can make your own copy of the spreadsheet above using the link attached below.
Use our sample spreadsheet to explore how each of the values affects the formula for total profit. If you’re ready to try out the Solver add-in, head to the next section to read our step-by-step breakdown on how to use it!
How to Use Solver in Excel
This section will guide you through each step needed to use the Solver add-in feature in Excel.
You’ll learn how to use the Solver to optimize a formula output by changing the values of other cells in the spreadsheet. We’ll also cover how to set constraints that will help the tool find an optimal solution given certain limitations.
Follow these steps to start using the Solver add-in function:
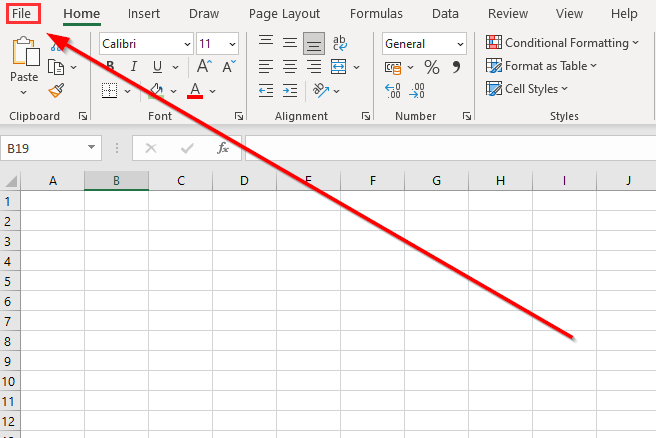
- First, we’ll have to add the Solver to our Excel program. Navigate to the File tab and select Options.
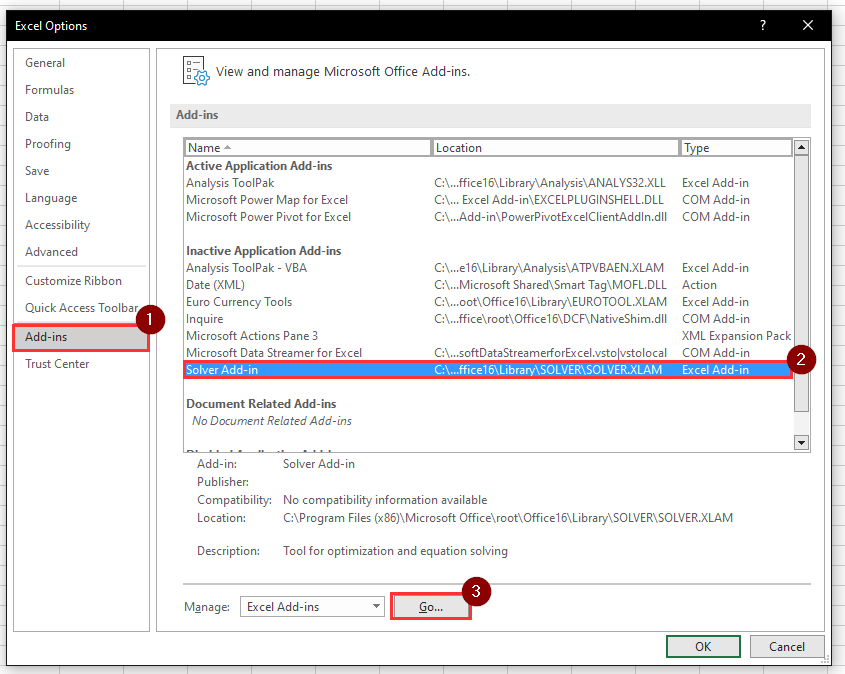
- In the Excel Options dialog box, click on the Add-ins tab. You should be able to see Solver in the list of possible Add-ins to activate. Click on the Go option.
- Check the Solver Add-in option from the list of available add-ins. Click on OK.

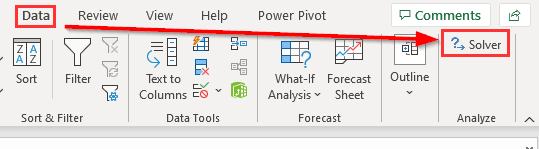
- You should now see the Solver feature under the Data tab.
- Next, the user must determine which cell to optimize in their worksheet. They should also decide which cells the Solver should be allowed to manipulate. In the example below, we want to maximize the total profit in cell B13. We want the Solver add-in to change the number of products to add to our inventory.
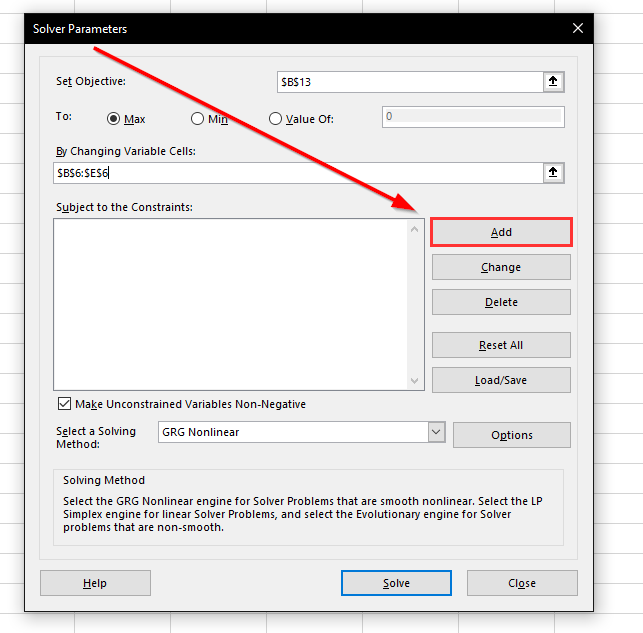
- Click on the Solver option in the Data tab to access the Solver Parameters dialog box. Type the cell you want to optimize in the text box next to the label ‘Set Objective’. Next, choose whether you want to maximize or minimize the cell. In this example, we want to maximize our total profit.

- Next, select the range of cells the Solver add-in will try changing. In this example, we’ll allow the tool to edit the cell range B6:E6.

- We can also set specific constraints that the Solver will follow. For example, we may want to maximize profits while staying within a certain budget. Click on the Add button to create a new constraint.
- The Add Constraint dialog pop-up will ask the user for the cell to take note and the constraint. The user must also indicate whether the value should not reach above or below the given constraint. In our example, we want cell B12 to not go over our budget in cell B11.

- After setting the constraints, click on Solve. The tool will compute the optimal value by changing the indicated values. The user can either keep the solved solution or restore the original values.
These are all the steps you need to follow to start using the Solver tool in your worksheet.
This step-by-step guide should be a good starting point for anyone who wants to use the Solver function in Microsoft Excel.
Hopefully our guide has shown you how useful the Solver tool can be for maximizing or minimizing values in your worksheet.
This function is just one example of the many Excel functions you can use in your spreadsheets. Our website offers hundreds of other functions and methods to help you get more out of Microsoft Excel.
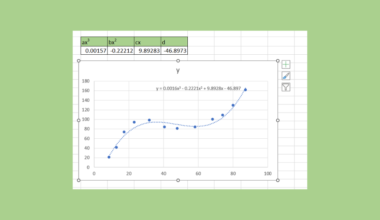
For example you can read our detailed guide on performing sensitivity analysis to analyze how different values affect a particular outcome.
With so many other Excel functions available, you can find one appropriate for your use case.
Don’t miss out on our team’s new spreadsheet tips, tricks, and best practices. Subscribe to our newsletter to stay updated on the latest guides from us!