This guide will explain how you can protect a sheet but still allow data entry in Excel.
Excel’s Protect Sheet option will only lock cells that have the Locked formatting. We can also use VBA code to indicate which cells to protect.
Let’s take a look at a basic example where you might need to protect your worksheet but still allow for data entry.
You have a spreadsheet that acts as a directory for members of a team. Only the spreadsheet owner can modify columns such as employee ID and employee position. Other users, should be able to edit other fields such as contact information or home address. How can we do this in Excel?
Excel’s Protect Sheet option can be used to protect the entire sheet from being edited. However, Excel also allows users to select which cells to keep unlocked when protected. We can use this feature to select ranges in our sheet that we want to keep unprotected for data entry purposes.
This use case is just one reason why we should specify locked and unlocked cells in Excel. Another use case would be to only lock cells that include formulas to prevent users from modifying any sheet calculations.
Now that we know when to selectively protect a sheet, let’s look at an actual worksheet that uses this method.
A Real Example of Protecting a Sheet while Allowing Data Entry in Excel
Let’s take a look at a real example of a spreadsheet that uses selective sheet protection for data entry.
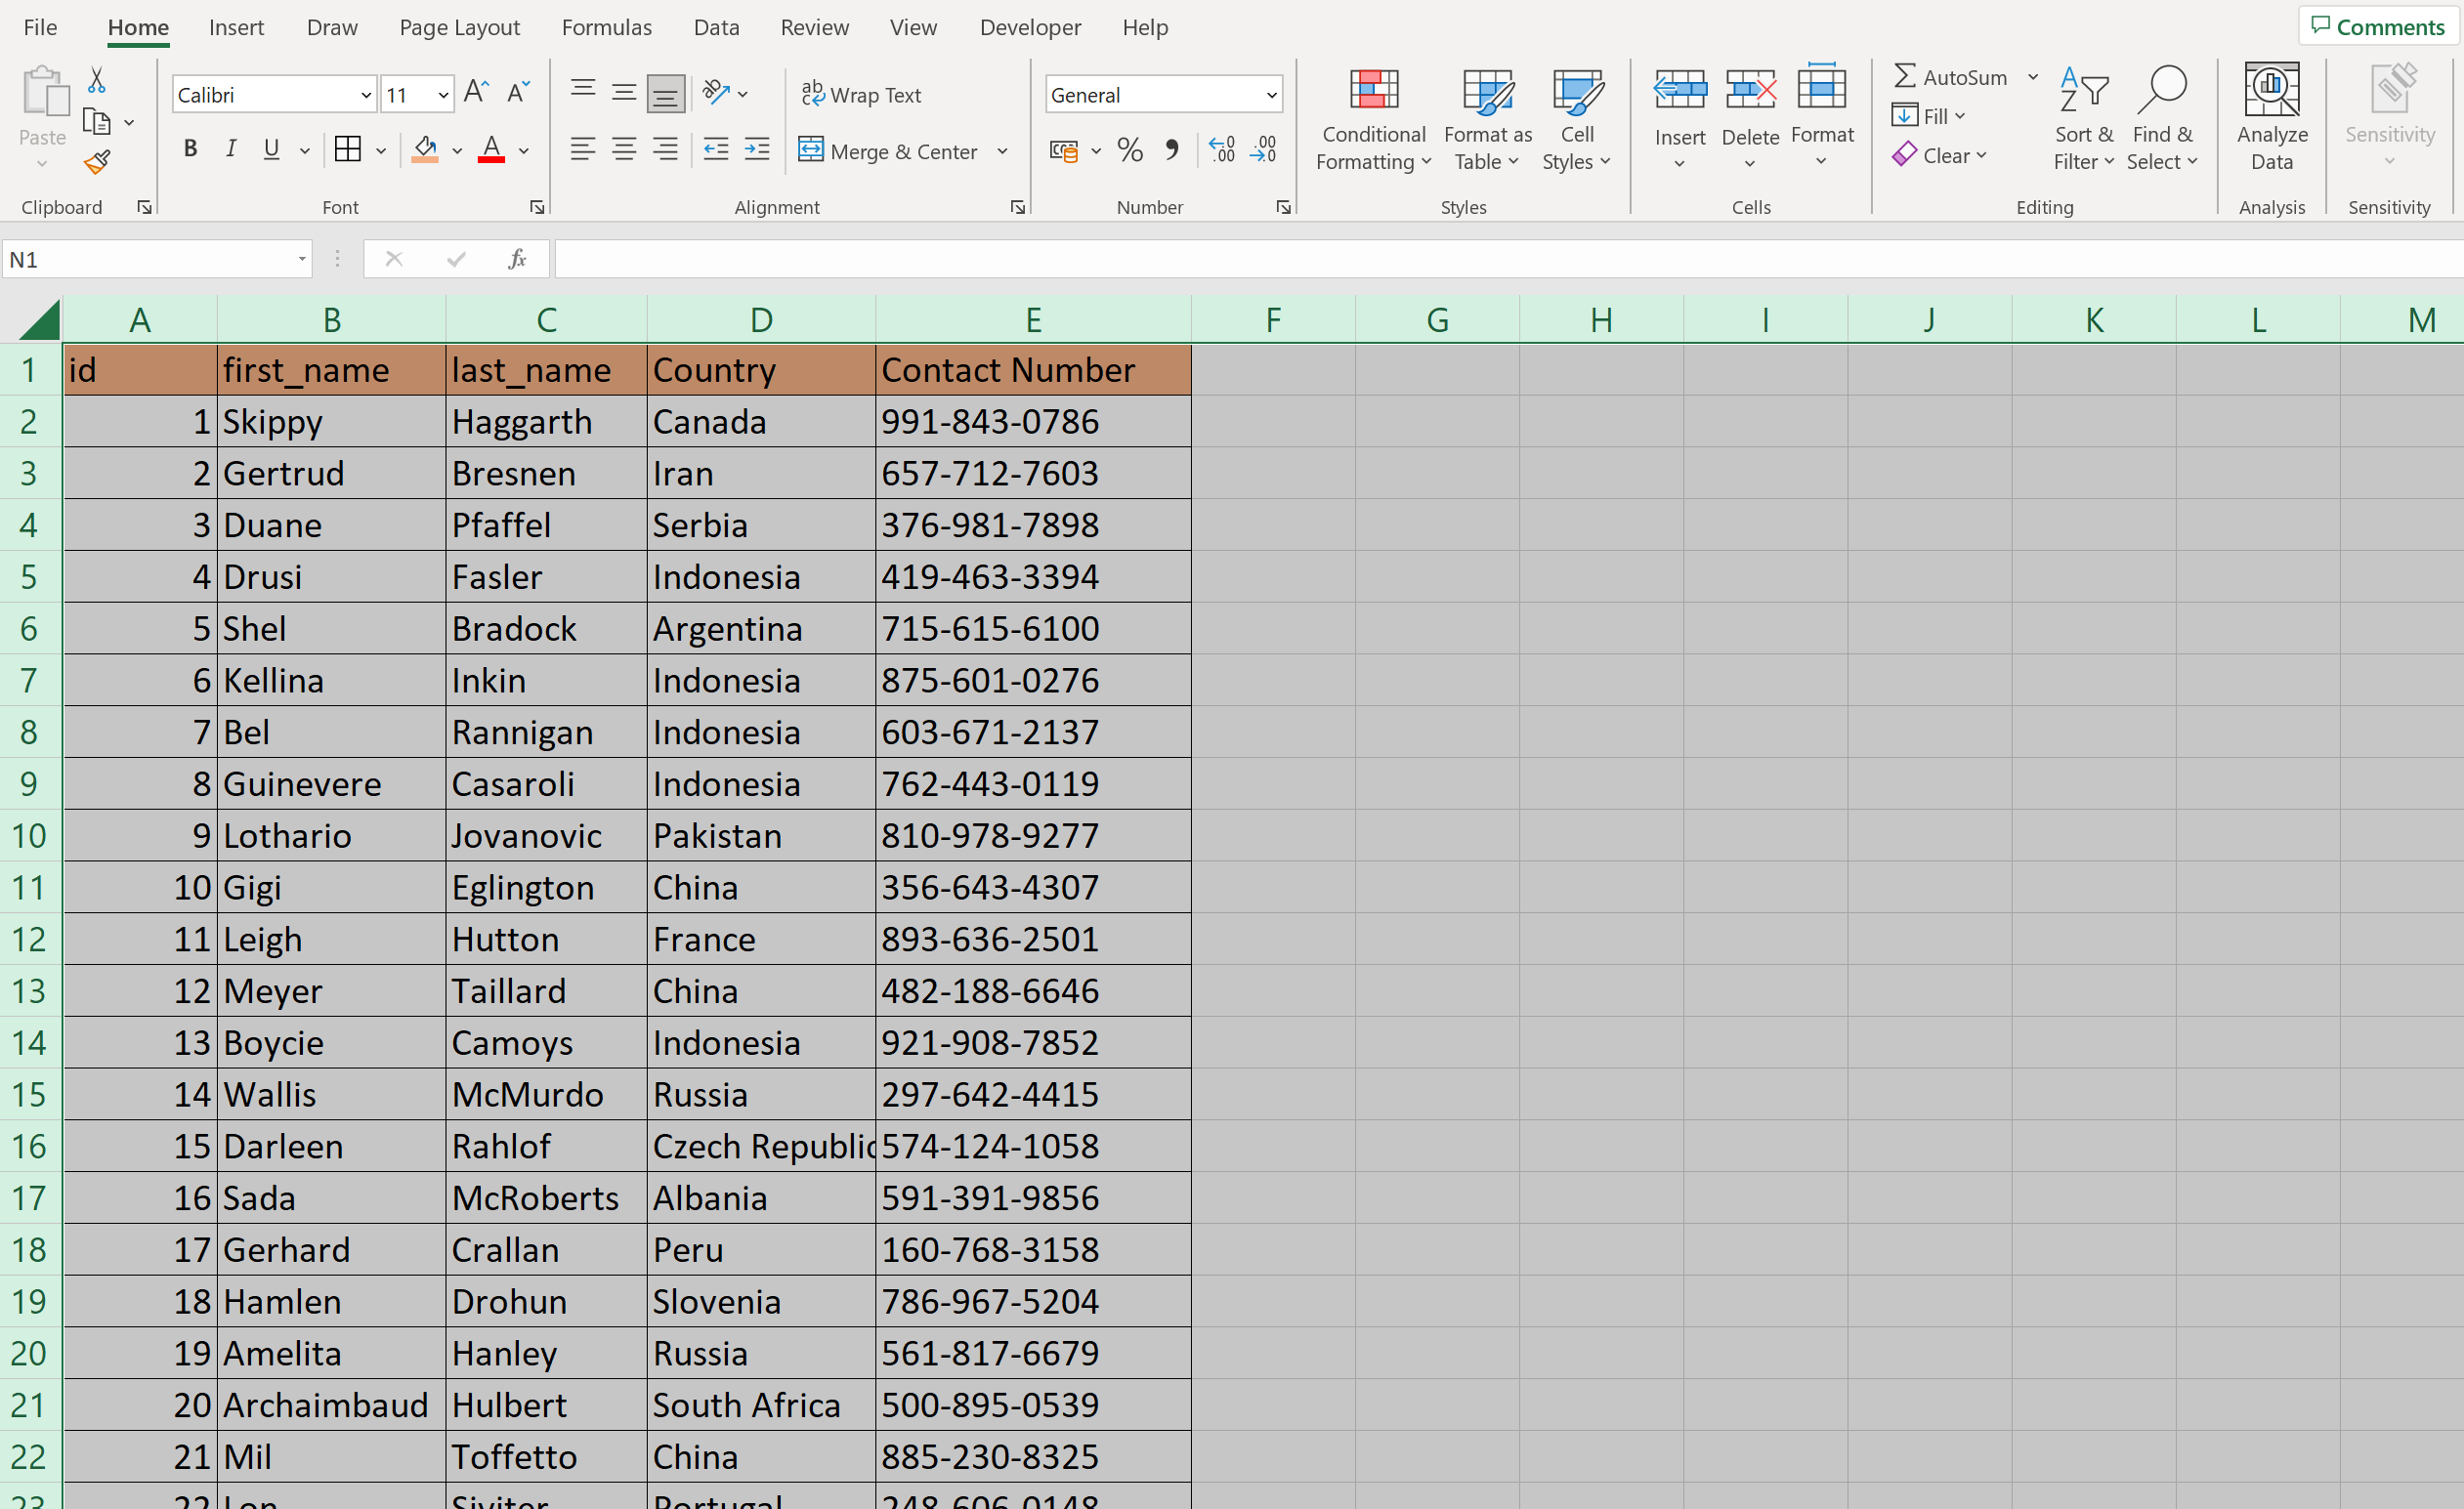
In the example below, we have a table that contains employee data. The spreadsheet owner has protected the columns A through D. Users other than the owner can still modify their contact number details in column E.

If another user tries to edit a protected cell, Microsoft Excel will display a warning stating that they are trying to change a protected sheet. To modify the cell, users will have to unprotect the sheet by providing a password.
We can also recreate this setup programmatically with VBA code. Advanced users can add an Excel VBA module that can protect certain cells in the currently active sheet.
We can use the following code in our new sheet
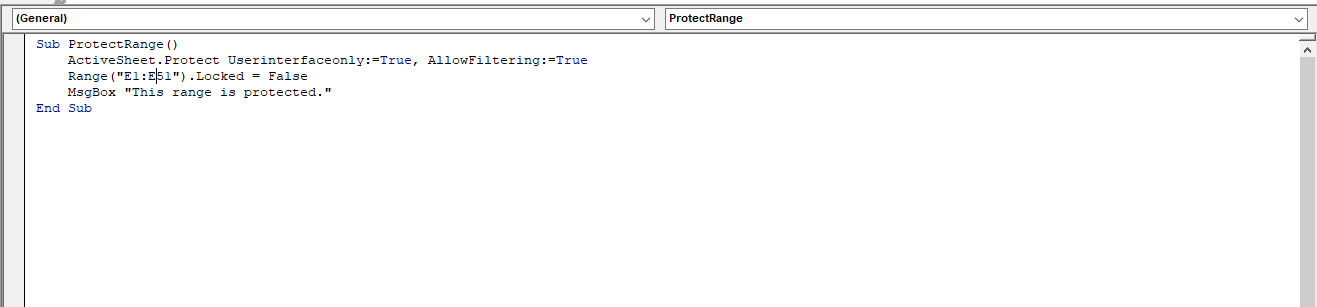
Sub ProtectRange()

    ActiveSheet.Protect Userinterfaceonly:=True, AllowFiltering:=True

    Range("E1:E51").Locked = False

    MsgBox "This range is protected."

End Sub
You can make your own copy of the spreadsheet above using the link attached below.
If you’re ready to try out this method in Excel, let’s start writing it ourselves!
How to Protect Sheet but Allow Data Entry in Excel
This section will guide you through how you can protect your worksheet while still allowing other users to enter data. You’ll learn how we can lock and unlock certain cells before protecting a sheet. Later, we will also look into how to protect a range of cells using VBA code.
Follow these steps to start protecting specific parts of your spreadsheet:
- First, select the entire worksheet using the shortcut Ctrl + A.
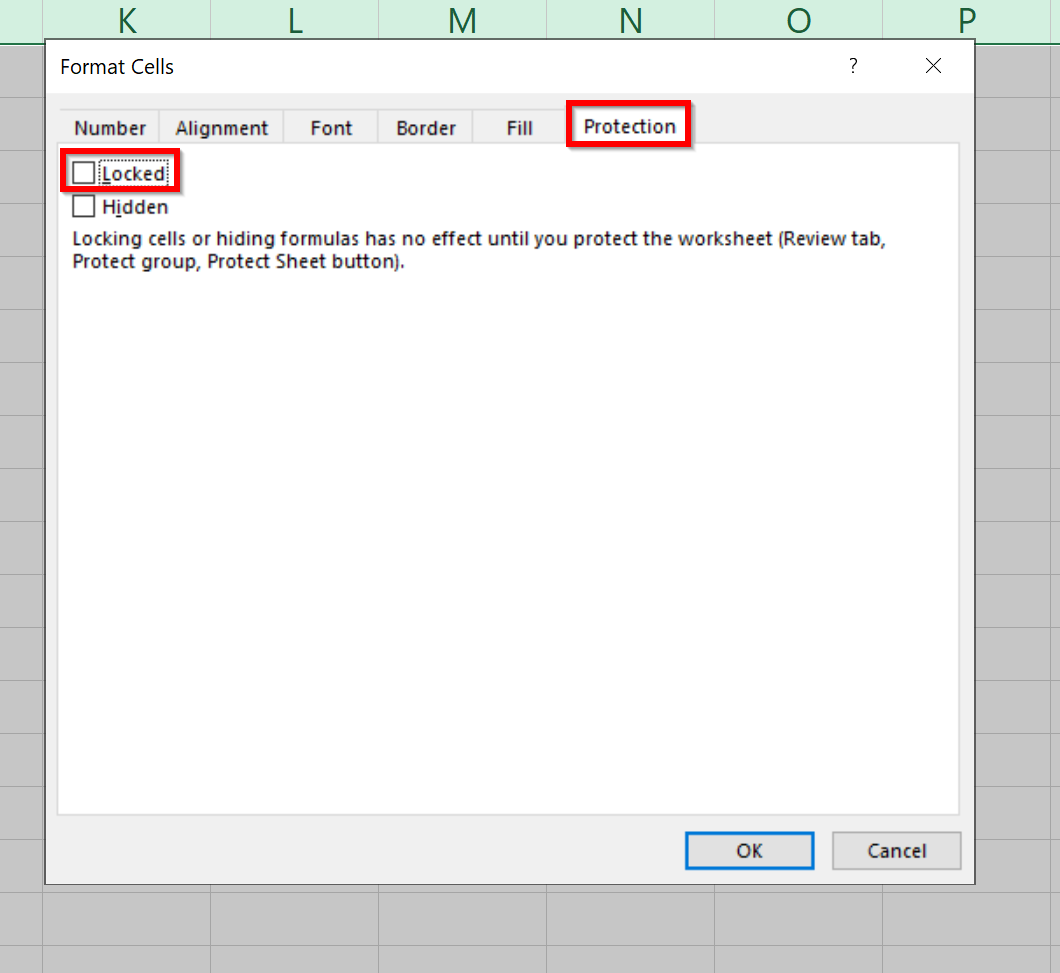
- Next, use the shortcut Ctrl + 1 to access the Format Cells dialog box. In the Protection tab, ensure that the Locked option remains unchecked. Since we’re applying this to the entire sheet, all cells are editable while the sheet is protected. Click on OK to apply these new options.
- Select the cells you want to keep protected. In this example, we want the first four columns to remain locked once the sheet is protected.

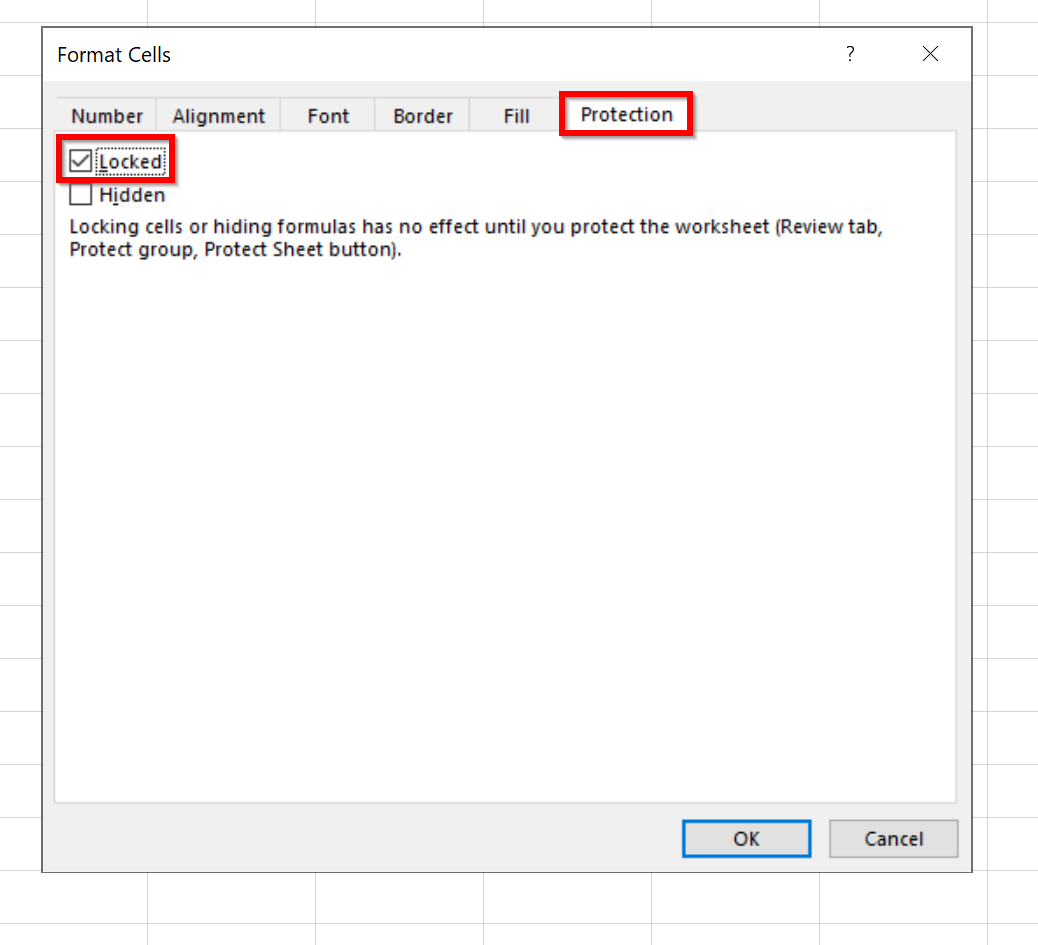
- Type the shortcuts Ctrl + 1 again to access cell formatting options. Under the Protection tab, check the Locked option and click OK.
- In the Review tab, click on the Protect icon and select the Protect Sheet option from the dropdown menu.
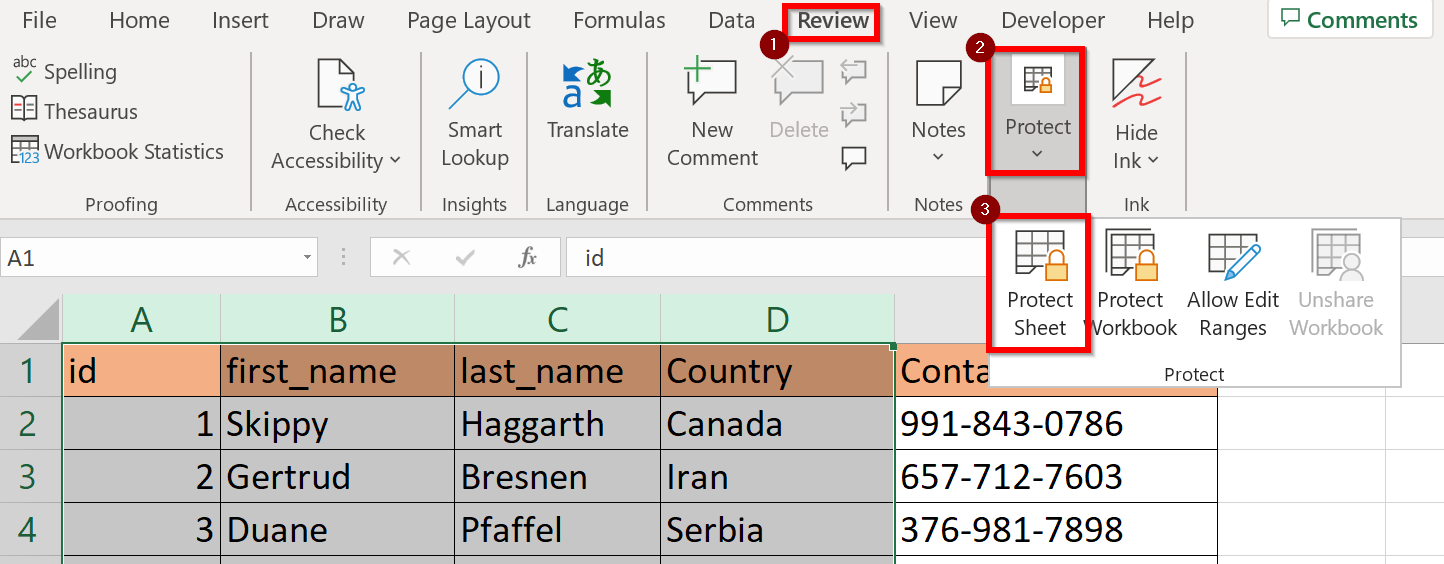
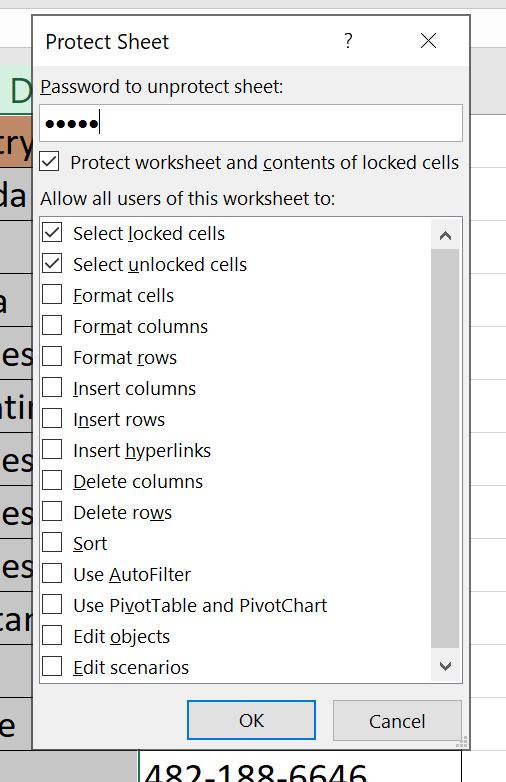
- Enter a secure password in case you need to unprotect the sheet later. Click on OK to protect the sheet.
- You now have selectively locked cells in your protected sheet. Users can change their contact number but will receive a warning when they try to edit other cells.
You can also protect a range of cells through VBA code. Here’s how you can do it:
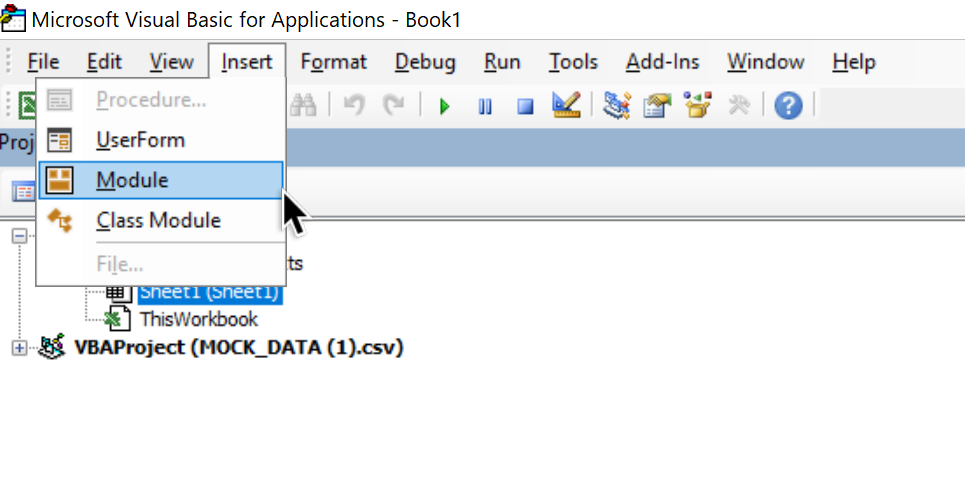
- First, go to the Developer tab and click on the Visual Basic option. This should open the Visual Basic editor in another window.

- In the new window, click on Insert > Module to add a new module to your current workbook.
- Paste the ProtectRange() code found in the previous section. Save the workbook. The workbook must be saved as an Excel Macro-enabled workbook.
- Once the code runs, users will now be prompted with our specified error message if they try to change a protected cell.

This step-by-step guide should be all you need to protect a sheet but still allow data entry in Excel. Our guide shows how easy it is to specify which cells to lock before we protect our cells.
The Protect sheet option in Excel is just one example of an Excel feature that can help manage your spreadsheets for sharing. With so many other Excel functions available, you can surely find one that works for your use case.
Are you interested in learning more about what Excel can do? Subscribe to our newsletter to find out about the latest Excel guides and tutorials from us.