This guide will explain how to fix missing row numbers and column letters in Excel.
When opening your Excel program, you may notice that the row numbers on the left and column letters at the top are missing. In this article, we will explain how to get these headings back.
The row and column headings in Microsoft Excel is an essential tool for users to help navigate and select data in a spreadsheet. However, there may be cases where these headings are not visible to the user.
Suppose you received an Excel file from your teammate at work. You notice that the file contains all the necessary data but is missing the row numbers and column letters.
Since you find it much easier to navigate the sheet with these headings, you would prefer to make them visible again.
In this guide we will explain three methods you can use to toggle heading visibility. We’ll show how to use Excel Advanced Options, the View tab, and Page Layout settings to toggle the row and column headings in your current worksheet.
Let’s take a look at a real example of an Excel spreadsheet with missing rows and column letters.
A Real Example of a Spreadsheet with Missing Headings
In the following section, we will provide an example of a spreadsheet with missing row numbers and column letters. We’ll also go in-depth on the various ways to bring these headings back into view.
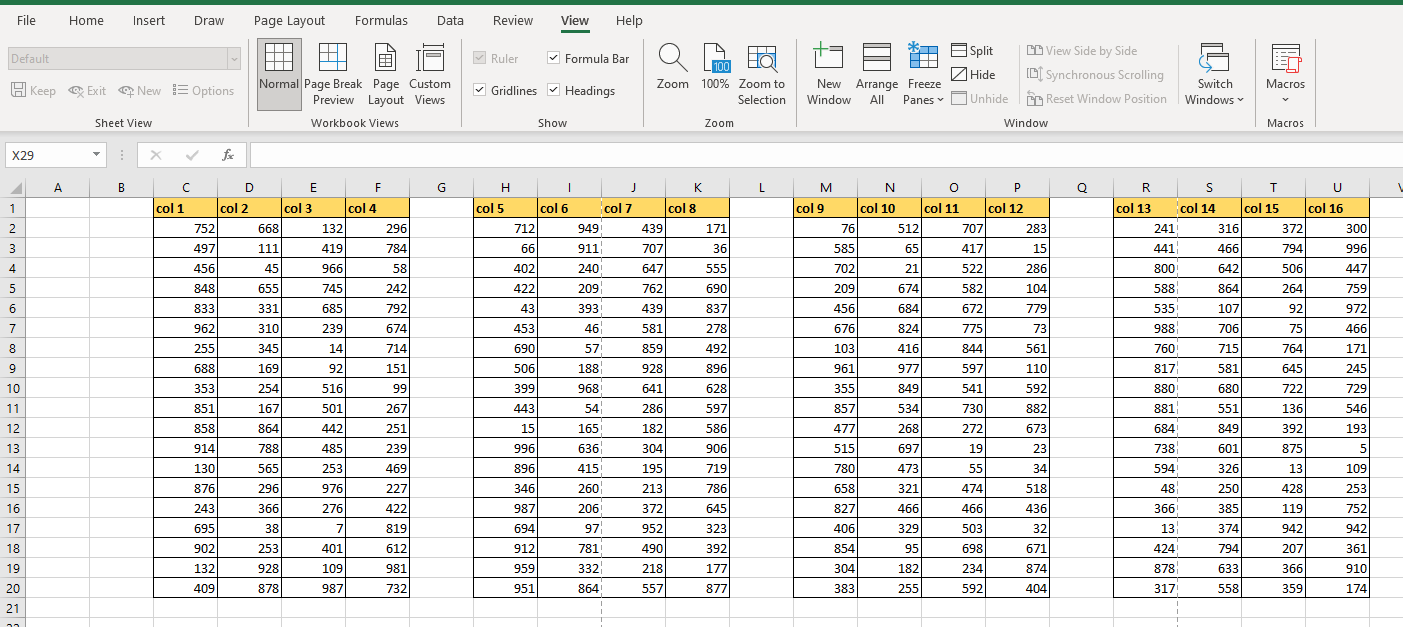
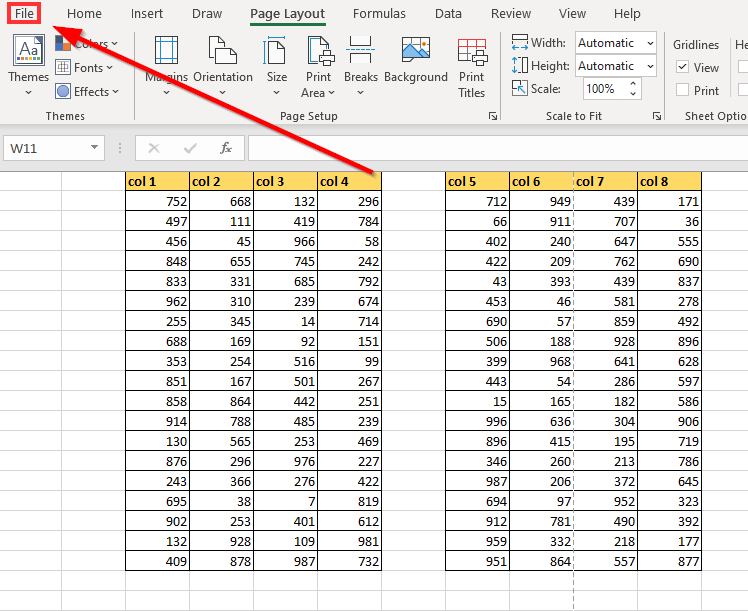
In the spreadsheet below, we have a collection of tables with four columns each. The user may notice the lack of headings on the left and top of the worksheet window. Without headings such as the row number and column letters, the overall spreadsheet has a cleaner look but may be difficult to navigate.

To get these columns back, we will have to re-enable headings in our current spreadsheet.
The first option is to enable the Headings option found in the View tab. This tab also allows you to toggle both the Formula bar and gridlines.
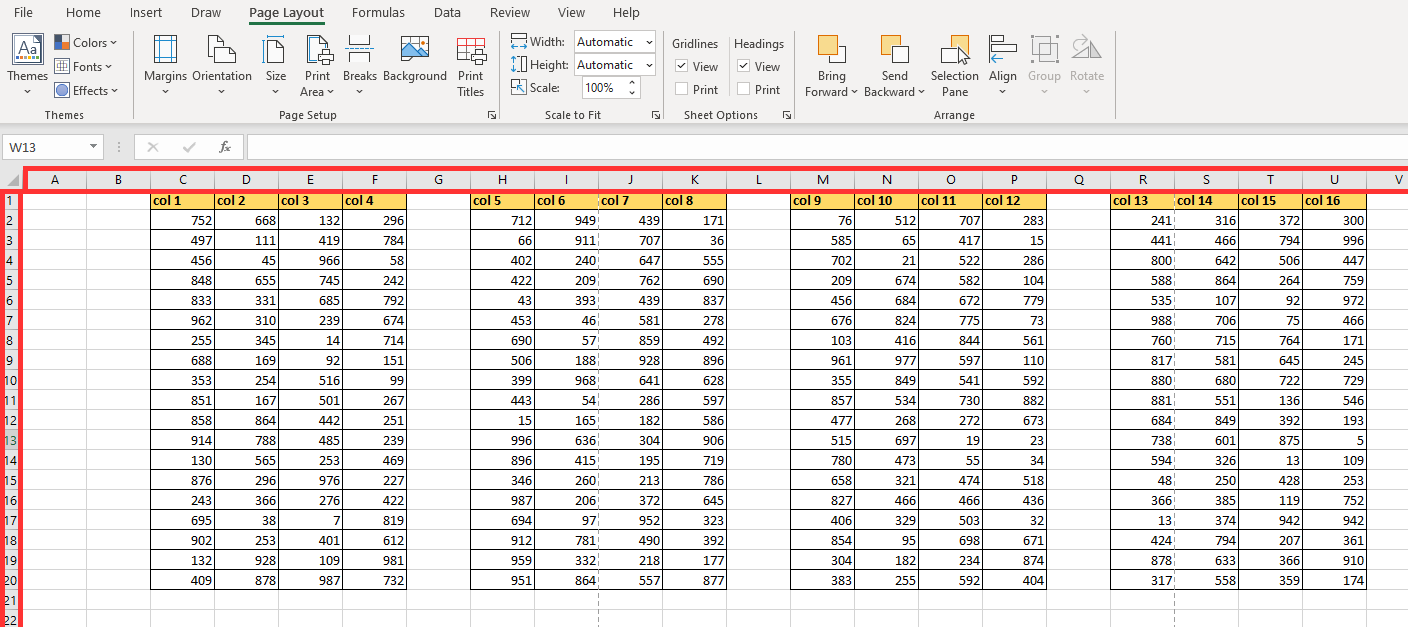
Besides this method, another way to fix the missing row and column headings is through the Page Layout tab. The Page Layout tab allows us to control what elements of our sheet appear when printing. The tab also allows us to control which elements appear when viewing it on the Excel application.
Lastly, we can toggle row and column headings by adjusting Excel’s Advanced Options. Under Display options, the user can find a checkbox that toggles row and column headers for a specific worksheet.
Do you want to take a closer look at our examples? You can make your own copy of the spreadsheet above using the link attached below.
If you want to try returning the headings back in Excel, head over to the next section to read our step-by-step breakdown on how to do it yourself!
How to Fix Missing Rows and Column Letters in Excel
This section will guide you through each method you can use to fix missing rows and column letters in Excel. You’ll learn how we can use Excel Advanced Options, the View tab, and Page Layout settings to accomplish this.
Follow these steps to toggle row and column headings in Microsoft Excel:
- Let’s start with the method involving the View tab. In the View tab, look for the group of options labeled Show. Check the checkbox next to the Headings option.
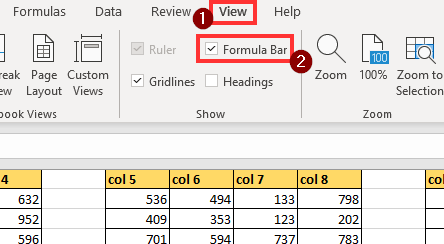
- Once the Headings option is toggled, the row numbers and column letters should now reappear on your Excel worksheet.
- We can also toggle the row numbers and column letters through Page Layout options. In the Page Layout tab, navigate to the Sheet Options group. The user can toggle
headings when viewing the spreadsheet in the application and during the actual print output.
- Once you’ve checked the checkbox next to the View option, the headings should now be visible on the selected worksheet.
- We may also use Excel’s Advanced Options to bring back the row and column headings. First, click on the File tab on the top-left-hand side of the application.
- Next, click on the Options button found at the bottom of the sidebar.

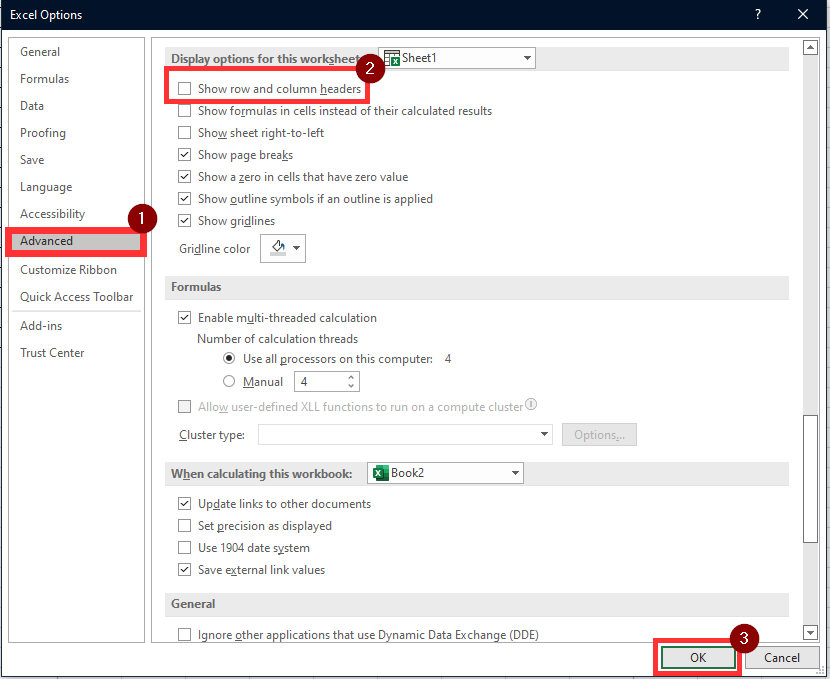
- In the Excel Options dialog box, navigate to the Advanced tab. Under the section labeled ‘Display options for this worksheet’, select the first option to show row and column headers. Click on OK to apply these changes.
These are the best methods you can use to fix missing rows and column letters in Excel.
This step-by-step guide should be all you need to fix missing row numbers and column letters in Excel. We’ve shown you three simple ways to toggle the row and column heading visibility in your worksheet.
The row and column headings are elements in Microsoft Excel that you can customize depending on your needs. Besides this guide, our website covers hundreds of other Excel methods and functions you can apply to your own spreadsheets.
With so many other Excel functions available, you can surely find one that suits your use case.
Are you interested in learning more about what Excel can do? Subscribe to our newsletter to look into the latest Excel guides and tutorials from us.