The ARRAY_CONSTRAIN function in Google Sheets is useful for situations where you need to extract a portion of data.
On some occasions, you may need to return only a subset of records from a cell range. You’ll find many functions in Google Sheets that can perform this and ARRAY_CONSTRAIN is probably the easiest to use.
ARRAY_CONSTRAIN works just by specifying the number of columns and rows you want to retrieve. This could be your best option for records that don’t require much operations beforehand. Furthermore, it can be used alongside other functions in Google Sheets to effectively limit the data you need to display.
In this article, we’ll have a look at the ARRAY_CONSTRAIN function in detail and learn how you can utilize it in your spreadsheet.
The Anatomy of the ARRAY_CONSTRAIN Function
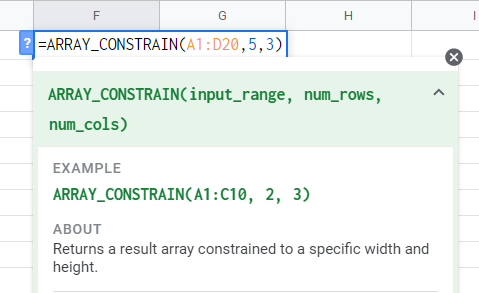
To use the ARRAY_CONSTRAIN function, let’s understand its syntax first. Here is the proper way of writing it:
Let’s try to understand further about the function by examining each parameter:
- = an equal sign signifies the start of a function. Any time we want Google Sheets to carry out a certain function, we type this in.
- ARRAY_CONSTRAIN() this is our
ARRAY_CONSTRAINfunction. By typing this, we are instructing Google Sheets to make the necessary operation using this function. - input_range is the parameter that will hold the cell range or data. This is where we will define the group of cells in which we will use the function.
- num_rows parameter should contain the number of rows you want Google Sheets to return when the function gets executed.
- num_cols on the other hand, should hold the number of columns to return.
That’s all you need to know to write the ARRAY_CONSTRAIN function. It’s straightforward, so it’s easy to get the hang of it. Now, let’s try to put this function into action.
A Real Example of Using ARRAY_CONSTRAIN Function
Below is a spreadsheet that contains 20 records.
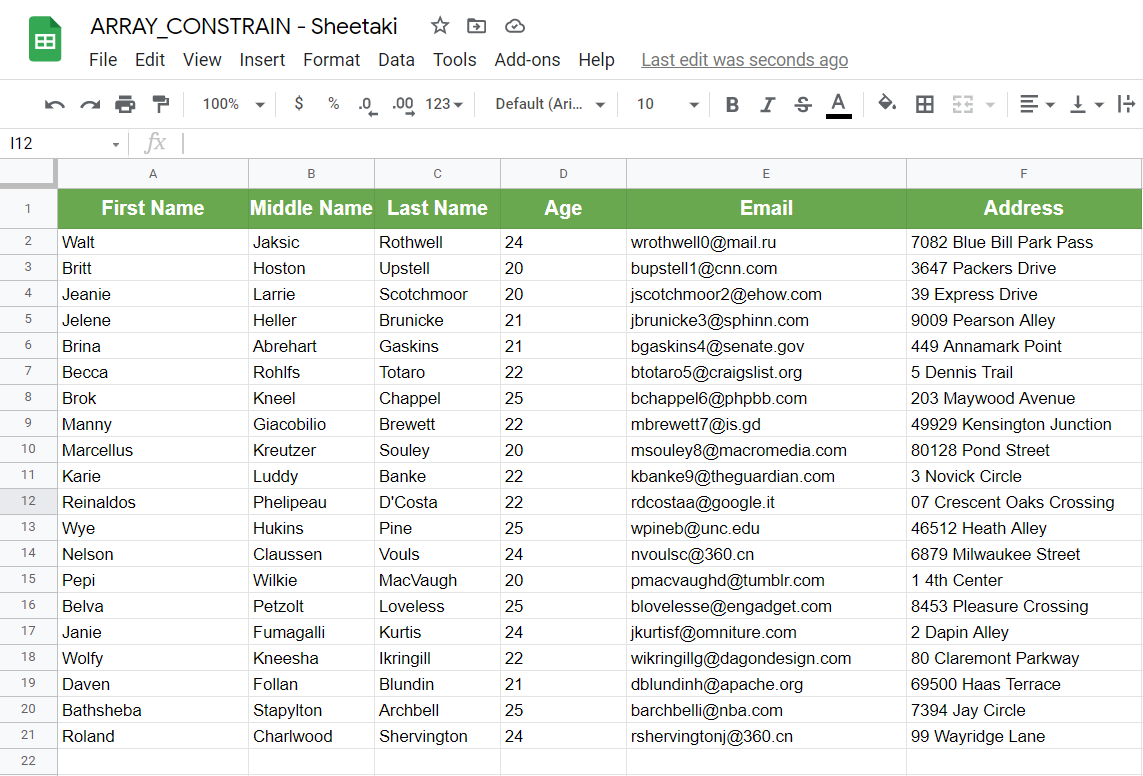
Let’s say we want to display the first three columns while limiting the records up to 10 only on another cell range. You can always accomplish this by copying and pasting them to the required cell range. However, you’ll find this method somewhat inconvenient, especially if you need to do this again for different limits.
Rather than the copy+paste method, use the ARRAY_CONSTRAIN function instead. In this way, you’ll be able to easily control the number of records to show with greater ease.

You’re probably wondering how it became more convenient over the copy+paste method since we still have to type a formula.
Well, if you decide to change the number of records included sooner or later, all you have to do is edit the num_rows and/or num_cols parameters, and the result will update automatically. This saves you the trouble of highlighting a group of cells and pressing a couple of keyboard hotkeys all over again.
Having known all the essentials of the ARRAY_CONSTRAIN function, it’s time to test it in a real-world scenario. Click the link below to have a copy of the example spreadsheet.
How to Use ARRAY_CONSTRAIN Function in Google Sheets
Earlier, you learned how to use the ARRAY_CONSTRAIN function in a simple set of data. This time, I will demonstrate how to utilize it with another function, as you may find this use case applicable to many situations.
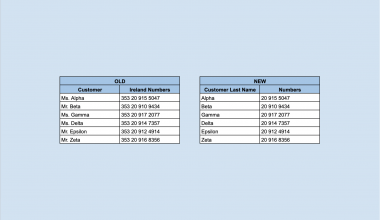
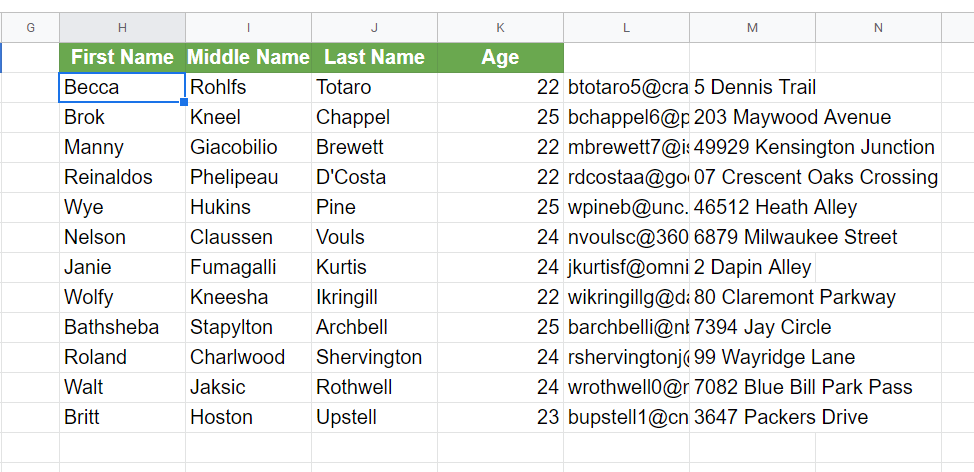
- Create a copy of the example spreadsheet by simply clicking the link provided above. Afterward, navigate to Sheet 2. You should see the following records.
 Our objective is to return the records of employees that are at least 22 years old and limit the results to 5 rows and 4 columns only. While it may seem complicated at first, we’ll just be needing two functions to accomplish it—
QUERYand of course,ARRAY_CONSTRAIN.
- Let’s break down our main objective so that we can accomplish it easily. We’ll start by focusing on the first part, which is to query the employees that are at least 22 years old. For this scenario, we’ll be using the
QUERYfunction.
You can check out this article about the QUERY function if you want to learn more about it. Otherwise, continue with our activity.
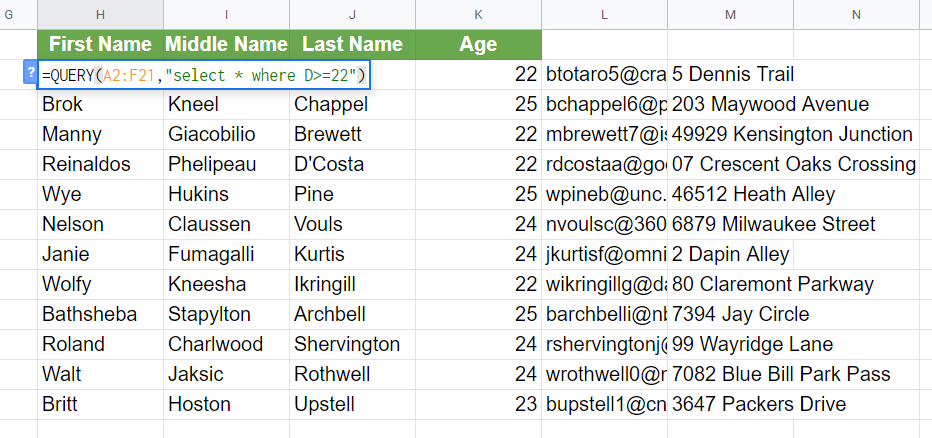
Copy the formula below and paste it to cell H2.
=QUERY(A2:F21,”select * where D>=22″)
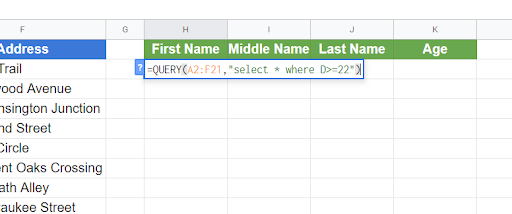
In a nutshell, the formula above simply pulls out the records from cells A2:F21 whose age column (D) exceeds or is equal to 22. Upon pasting the formula, press the Enter key on your keyboard. You should now have an output similar to this.
- Now, we’ll have to proceed with the second part of our objective, which is to limit the result into 5 rows and 4 columns only. This time, let’s use the
ARRAY_CONSTRAINfunction to complete our objective.
We need to edit the recently-pasted formula, so double click on cell H2.
- Recall that when writing an
ARRAY_CONSTRAINfunction, the first parameter (input_range) should hold the cell range or data that we need. In this case, the data that we need to define is the result of the QUERY function. It only makes sense that we make the whole QUERY formula our initial parameter.
Right after the equal sign, type ‘ARRAY_CONSTRAIN(’. Doing this will now make the entire QUERY formula as the input_range parameter.
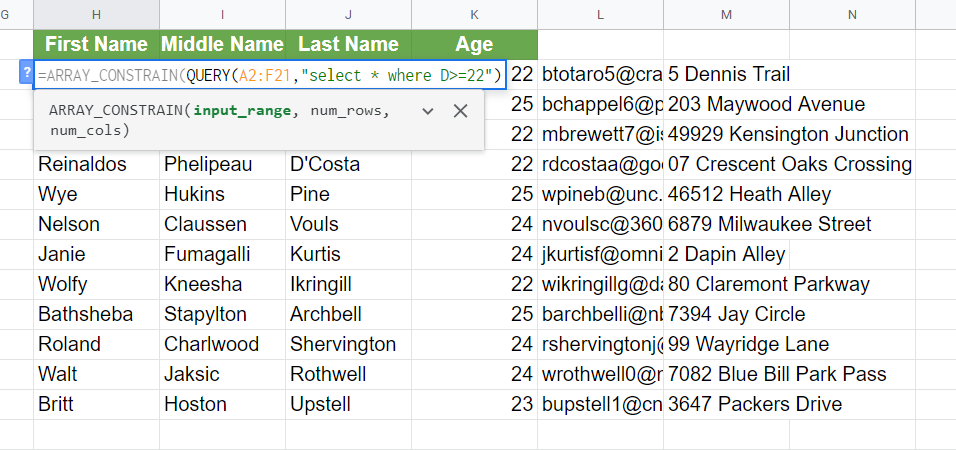
- Let’s complete the function by specifying the number of rows and columns. Towards the end of the formula, indicate 5 as the num_rows and 4 as the num_cols parameters. Be guided by the image below.

- Once all parameters have been specified, press Enter. Your final output should look like this.
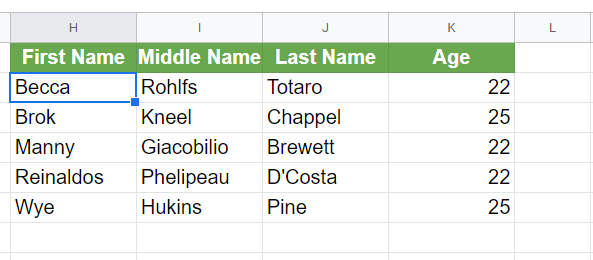
As you can see, theARRAY_CONSTRAINfunction also works on an existing formula. You may eventually find other use cases wherein you can apply this function too. Just always remember thatARRAY_CONSTRAINonly works if all parameters are defined.
There you have it! I just showed you how to utilize the ARRAY_CONSTRAIN function in different circumstances. Now you can use it along with other Google Sheets functions to simplify your work.