


This guide will discuss how to use SmartArt Hierarchy in Excel.
Excel is a popular tool for calculations and numbers. But, there are also many features and functions in Excel that allows us to present our data and results better visually.
So many people also use Excel for its various charts and tables, often used to present data. Additionally, there is a feature in Excel called SmartArt graphic. And it is used to visually present information and ideas.
Furthermore, SmartArt Hierarchy is an excellent tool used for showing information that involves organizational structure, order, or hierarchy in an institution or company. And we can create different layouts that fit our data and information.
Unlike the basic charts available, SmartArt allows us to create high-quality illustrations with just a few steps. Specifically, SmartArt Hierarchy makes it easy for us to create illustrations representing a hierarchy or organizational structure.
Let’s take a sample scenario wherein you will use a SmartArt Hierarchy in Excel.
Suppose you were asked to create the organizational chart for your company. But, you don’t want to spend too much time creating a chart that would represent the hierarchy of positions. So you opted to use a SmartArt Hierarchy, which would be faster and more efficient.
Awesome! Let’s not waste any time and move on to a real example of using a SmartArt Hierarchy in Excel.
A Real Example of Using SmartArt Hierarchy in Excel
Let’s say we need to create a hierarchy chart for the positions in a company. And we do not want to spend too much time formatting and editing a basic chart. So this is where SmartArt Hierarchy comes in.
For instance, we will have the President at the very top. Then, we need to input the Vice President at the bottom. Afterward, we will place a Project Manager with two staff below them.
SmartArt Hierarchy will make this task easier and more efficient because we will just insert the appropriate chart and input the needed information or text. Additionally, editing the organization chart is also really simple. We can easily add or remove shapes in the chart depending on what we need.
Furthermore, we can modify our organization chart. So we can change its colors, change the layout. And we can also swap positions between shapes that are on the same level.
Essentially, SmartArt Hierarchy just makes the tasks so much easier and faster. And our final organizational chart of the positions in the company would look like this:

You can make your own copy of the spreadsheet above using the link attached below.
Great! Now it’s time to learn the step-by-step process of how to use SmartArt Hierarchy in Excel.
How to Use SmartArt Hierarchy in Excel
In this section, we will discuss the step-by-step process of how to use SmartArt Hierarchy in Excel. Furthermore, each step will contain detailed instructions and pictures to guide you throughout the process.
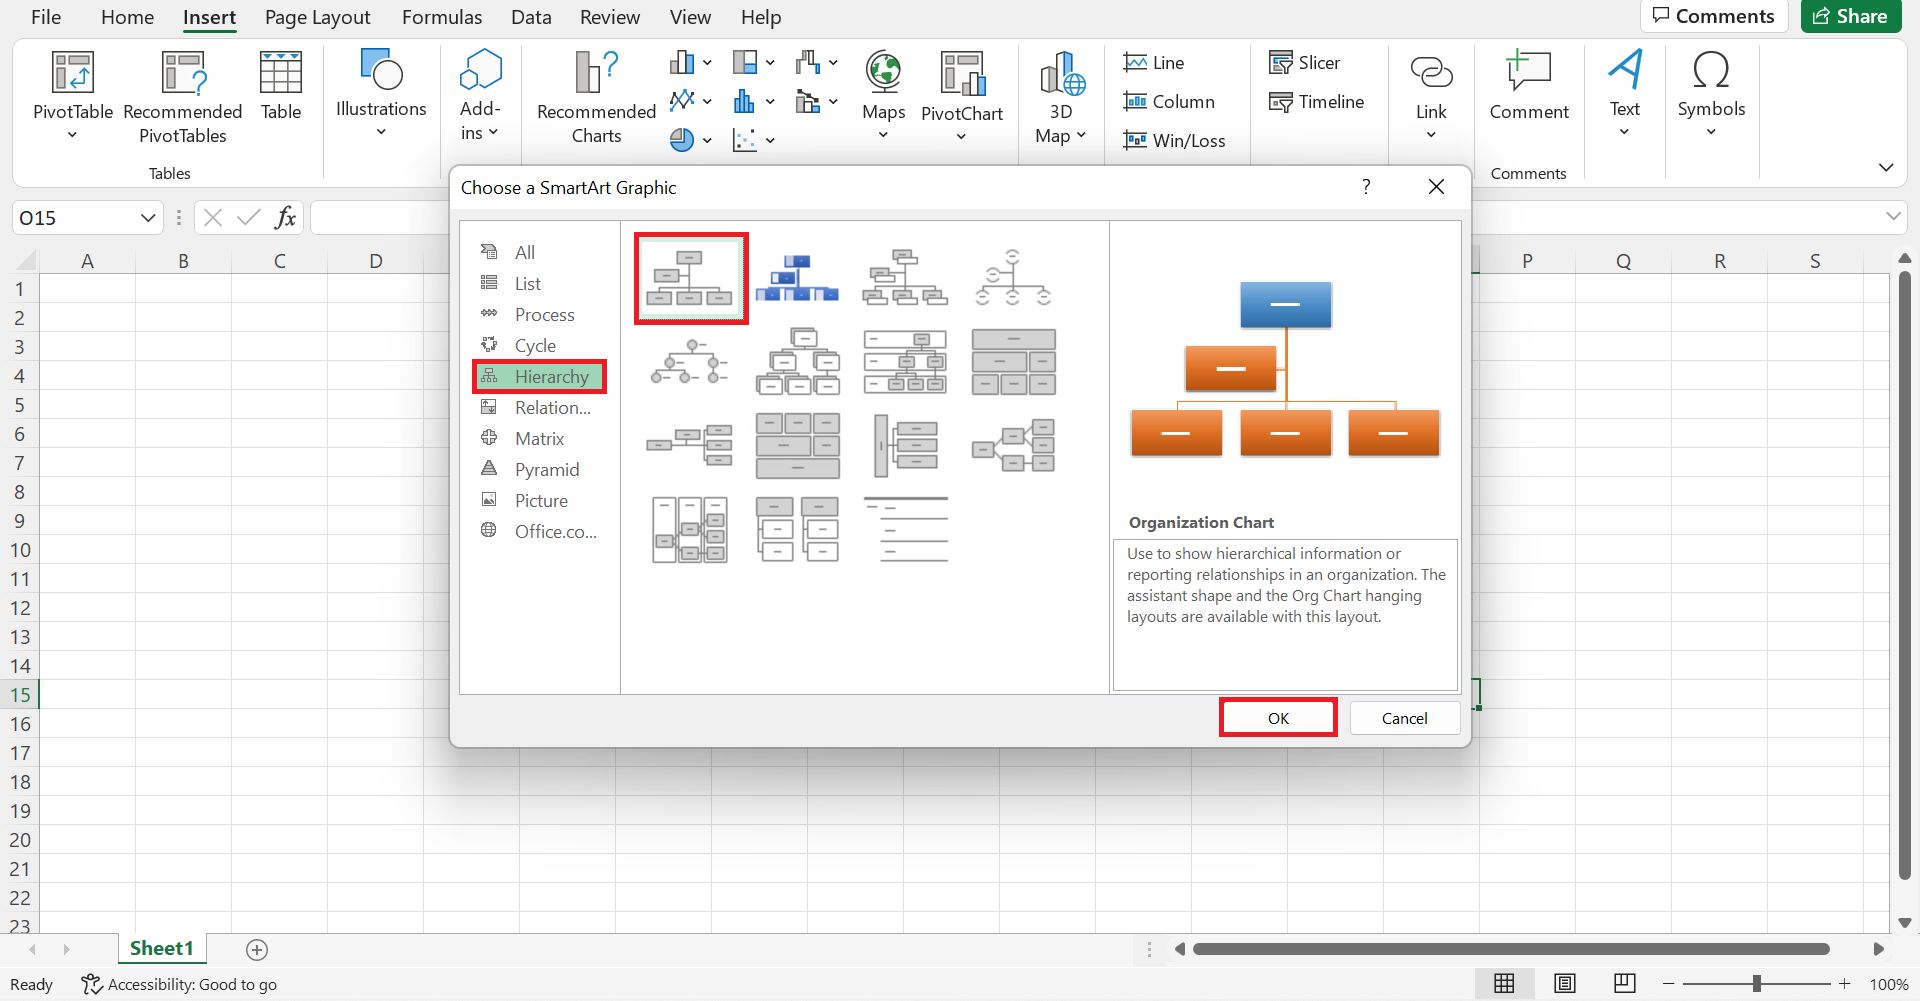
1. First, we need to insert a SmartArt Hierarchy. To do this, go to the Insert tab. Then, click on Illustrations. Finally, select SmartArt in the dropdown menu.

2. Afterward, a dialog box will appear. So go to the Hierarchy tab. Then, we can select the Organization Chart available that fits our data. And the selected chart will appear on the sheet. Lastly, click OK to display the chart.
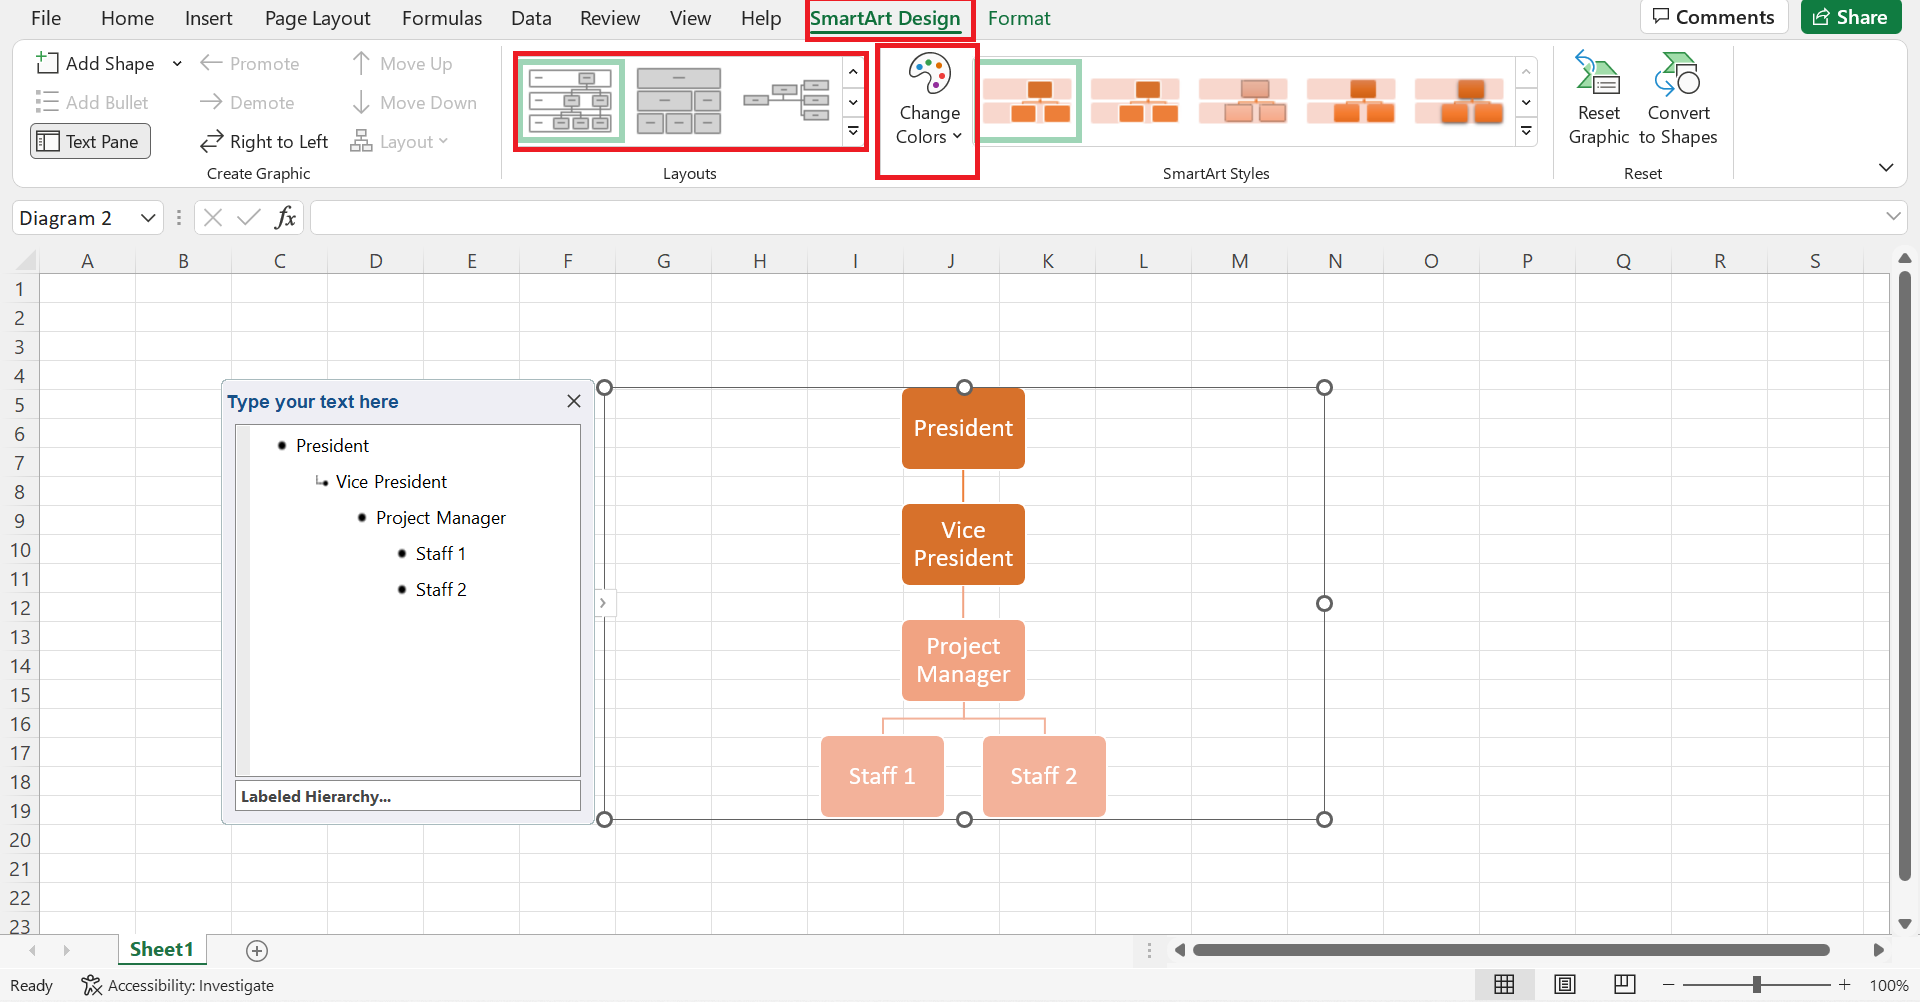
3. Thirdly, we will input our own data or information. To do this, we can double-click on the textboxes to type. And we can also type our information in the small dialog box that appears beside the chart. So it will automatically update the chart based on what we are typing.
Now we can input the positions in the company accordingly. In this case, we will place President and Vice President at the top.

4. Next, let’s fix the structure of our chart. In our example, a Project Manager has two staff working below them. Firstly, let’s delete the unnecessary shapes by simply selecting them and pressing the Backspace key.

5. Then, go to the SmartArt Design tab. From there, click Add Shape. In the dropdown menu, select Add Shape Below. Then, we will input the Project Manager in the new shape.

6. Repeat the previous step to add two more shapes below the Project Manager for the two staff working under them.
7. Next, we will modify the chart according to our preferences. Firstly, click the chart. Then, go to the SmartArt Design tab. And we have the options to Change Layout and Change Colors. So simply click on your desired style and edit.
8. If we need to swap any shapes, we can easily do it. So simply go to the SmartArt Design tab. Then, we can select Promote, which will bring a shape up a level, or Demote, which will bring a shape down a level.
Alternatively, there are also two arrows which are Move Up and Move Down, that will bring the shape up or down in the chart.

9. And tada! We have successfully used a SmartArt Hierarchy in Excel.
And that’s pretty much it! We have discussed how to use SmartArt Hierarchy in Excel. And we also explained the step-by-step process of how to insert a SmartArt Hierarchy in your worksheet. Additionally, we learned how to edit and modify our organization chart. Now you can apply this in your own work whenever necessary.
Are you interested in learning more about what Excel can do? You can now use the various other Microsoft Excel formulas available to create great worksheets that work for you. Make sure to subscribe to our newsletter to be the first to know about the latest guides and tutorials from us.


