This guide will explain how to use the LET function in Google Sheets to define named variables within a formula.
When creating complex formulas in Google Sheets, you may encounter cases where you must evaluate a particular formula multiple times.
For example, let’s say we have an array of values, and we want to filter the data to show all values that have a remainder between 1 to 3 when divided by 5. In other words, we want to check all values where 0< MOD(value, 5) < 4.
We can perform this calculation using the following formula:
=FILTER(A2:A14, MOD(A2:A14,5)>0, MOD(A2:A14,2)<4)
One issue with the formula above is that we have to use MOD twice to achieve our result. While this additional computation is negligible for small datasets, it can become inefficient with larger datasets.
Google Sheets introduced a function known as LET that allows us to compute values like our MOD expression once and store it for later use. With the LET function, we can assign a name for our expression and use that name as many times as needed in our formula.
In this guide, we will provide a step-by-step tutorial on how to use the LET function to create more efficient and readable formulas in Google Sheets.
Let’s dive right in!
The Anatomy of the LET Function
The syntax of the LET function is as follows:
=LET(name1, value_expression1, [name2, …], [value_expression2, …], formula_expression )
Let’s look at each parameter to understand how to use the function.
- = the equal sign is how we start any function in Google Sheets.
- LET() refers to our
LETfunction. This function allows us to assign an identifier for an expression we can use in another formula. - name1 refers to a name to assign to a particular expression.
- value_expression1 refers to the formula we will refer to in the formula_expression argument.
- name2… and value_expression_2… are optional arguments. The user can choose to add multiple assigned names for multiple value expression arguments.
- formula_expression refers to the formula to be calculated.
- Do note that the value_expression parameters only evaluate once even if they are used multiple times in the formula_expression argument.
A Real Example of the LET Function in Google Sheets
Let’s explore a simple example of a formula we can improve with the LET function.
In the table seen below, we have a column of random numbers that we want to filter out.
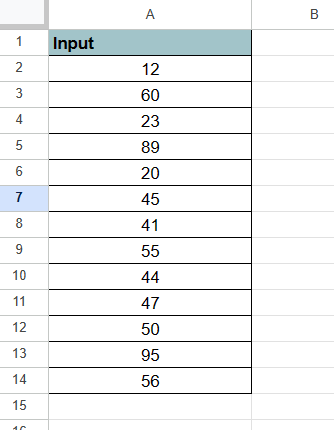
In a new table, we want to return a filtered list of all numbers that have a remainder between 1 to 3 when divided by 5.

Without the LET function, we can use the following formula:
=FILTER(A2:A14, MOD(A2:A14,5)>0, MOD(A2:A14,2)<4)
The formula above only outputs the result after computing for MOD(A2:A14,2) twice.
We can improve the formula with the LET function:
=LET(rem, ARRAYFORMULA(MOD(A2:A14,5)), FILTER(A2:A14,rem>0,rem<0))
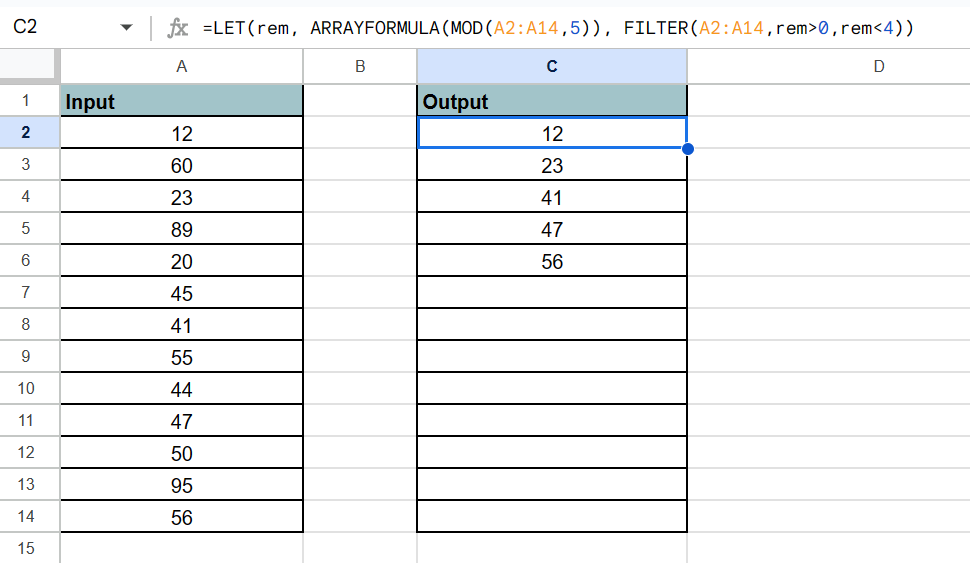
The LET function evaluates the MOD formula once and stores it under the name “rem”. The “rem” value can then be called as many times as needed in the FILTER function without any cost.
Do you want to take a closer look at our examples? You can make your own copy of the spreadsheet above using the link attached below.
If you’re ready to try using the LET function yourself, head over to the next section to read our step-by-step breakdown on how to do it!
How to Use the LET Function in Google Sheets
This section will guide you through each step needed to use the LET function to assign names to a calculation result.
Follow these steps to start using the LET function:
- First, select an empty cell and type the string “=LET(“ to start the
LETfunction. For the first argument, we must assign a name to the expression we want to store.
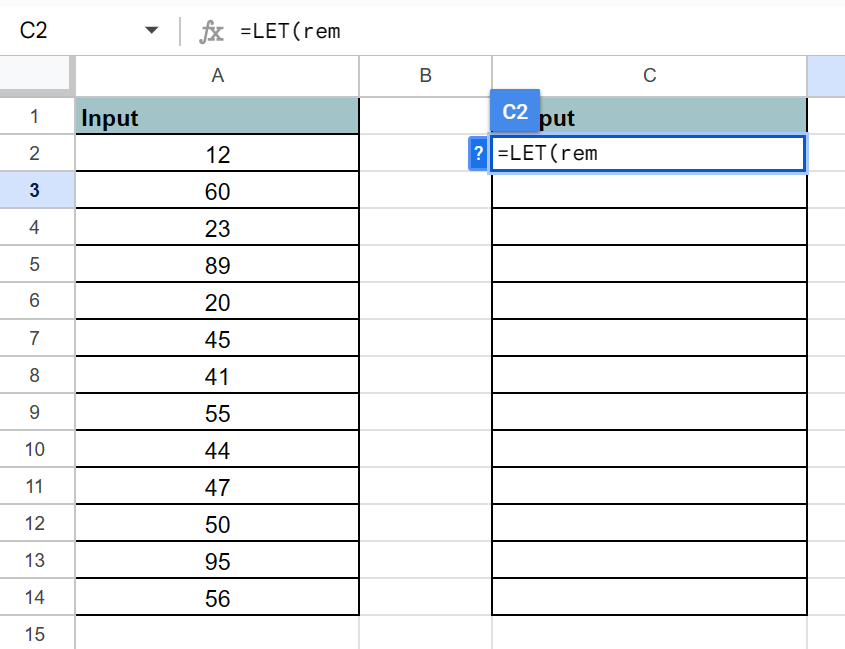
In our example, we want to store the result of ourMODfunction as “rem” or remainder.
- Next, write down the expression you want to evaluate and store.

In the example above, we used theARRAYFORMULAfunction to indicate we want our MOD function to return an array.
- After assigning at least one name, we can proceed with the formula the
LETfunction will evaluate and output. We can use the names we’ve assigned instead of writing the entire expression.

In our example above, we’ve used the name “rem” in our formula instead of typing out the entireMODfunction twice.
- Hit the Enter key to evaluate the
LETfunction.

- Users can also add more than one name with the
LETfunction. Each pair of names and expressions must be added before the final formula_expression parameter.
 In the example above, we’ve added two additional names “min” and “max”.
Frequently Asked Questions (FAQ)
Here are some frequently asked questions about this topic:
- When should I use the LET function?
There are two main use cases for theLETfunction: improving formula performance, and improving readability.
TheLETfunction can help with performance since it allows you to store the value of an expression once and use it multiple times throughout your formula.
TheLETfunction can help with readability by allowing users to write shorter formulas. Instead of using a vague formula, the user can label the expression clearly with a meaningful name.
This tutorial should cover everything you need to know about the LET function in Google Sheets.
We’ve explained how to use the LET function to improve the readability and performance of complex formulas through the use of names.
The LET function is just one of many useful functions you can add to your spreadsheets. If you’re interested in learning more about the FILTER function used in the example earlier, you can check out our complete guide on how to use it.
You may also be interested in our guide on nested IF statements if you plan on creating more formulas with complex logic in Google Sheets.
That’s all for this guide on the LET function in Google Sheets! If you’re still looking to learn more about Google Sheets, be sure to check out our library of spreadsheet resources, tips, and tricks!