Learning how to record a macro is useful for automating repeated tasks in Google Sheets.
One of the best things about Google Sheets is its Macros feature. This feature allows you to record actions within your spreadsheet and save them so that you can reuse them later on.
For instance, you’re working on a spreadsheet that requires special formatting and a formula that needs to be re-used across different sections. Instead of copying and pasting them, you can just record your actions as a macro and call on it anytime when needed. This lets you automate frequently repeated tasks on your spreadsheet, making your work more efficient.
What is Macro in Google Sheets?
A macro is a set of instructions that specifies how a task should be performed. Think of it as a small program within Google Sheets that lets you automate how you do things.
Here’s how a macro works in Google Sheets in a nutshell.
First, you start to record a macro at the click of a button. While recording, you just need to perform your intended actions on your spreadsheet. Afterward, you can already stop recording and save the captured actions as a new macro. Whenever you need to redo the actions on another part of your spreadsheet, you can just call on the recently saved macro to automate the process.
Do you see how convenient a macro is? Macro is handy for spreadsheets that have lots of data to work on. This feature can significantly lessen your time and effort in doing all your tasks, ranging from formatting to computation.
How to Automate Tasks in Google Sheets with Macros
If you want to automate tasks using macros, you must learn two things—recording and running a macro. Thankfully, you can easily do these tasks through the Macros feature under the Extensions menu of Google Sheets.

How to Record a Macro in Google Sheets
Before you can start using a macro, of course, you need to record one first. For you to easily follow along, start by clicking the link below to generate a copy of our own example spreadsheet.
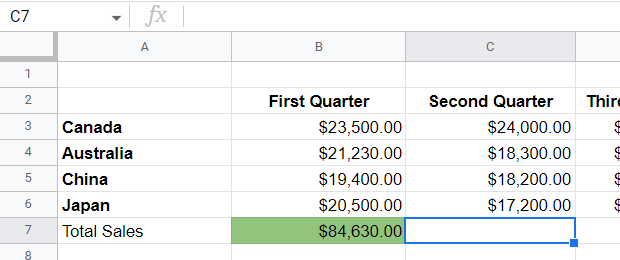
- Upon opening the spreadsheet, you’ll notice a sheet named Quarterly Sales, which contains data similar to the image below.

Our objective for this activity is to record a macro that will compute the total sales of each quarter and apply conditional formatting to the result. - Let’s focus on the First Quarter column first. We’ll need to compute the total sales of this quarter and show the result on cell B7. But before that, we need to start recording our succeeding actions to reuse them later on. To do so, click the Extensions menu and select Macros. Afterward, choose Record macro.

- Upon clicking the Record macro option, you’ll notice that a recording menu similar to the image below appears on your screen.
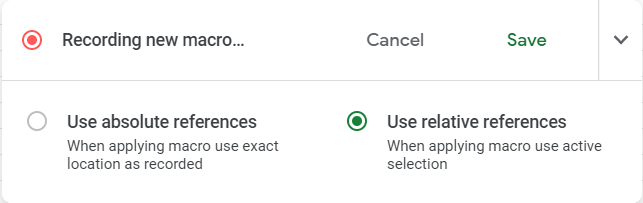
The recording menu signifies that you are now recording a new macro. Every change you make to your spreadsheet will be recorded until you end the recording process. - There are two options to choose from when recording a macro. Depending on what you need to achieve, you can either select absolute references or relative references.
The first option is the appropriate choice if you need to perform your intended actions only on fixed cells. For instance, if you format cell range A1:B3 and select the absolute references option, it will always apply the macro to this cell range every time you run the macro.
On the other hand, relative references will apply the macro based on your mouse cursor. This is usually the appropriate option when using formulas that use relative cell references. And since this is our case, we’ll need to choose this option.

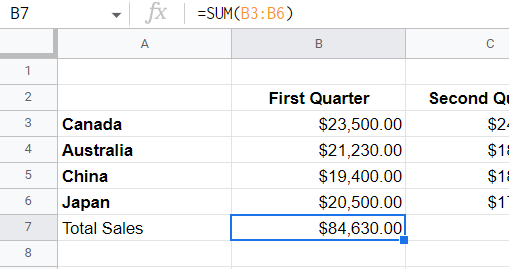
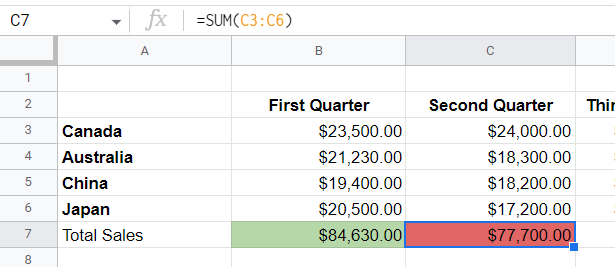
- Now that we are recording our new macro, it’s time to perform the necessary computation and formatting. In cell B7, use the
SUMfunction to compute the total sales of the first quarter. Refer to the example below.

- Once you have entered the formula, it is expected that the total first-quarter sales will now reflect on your current sheet.
For a few seconds, you’ll also notice that the recording menu will notify you that an action has been recorded. In this case, you can proceed with the other actions that you need to do.
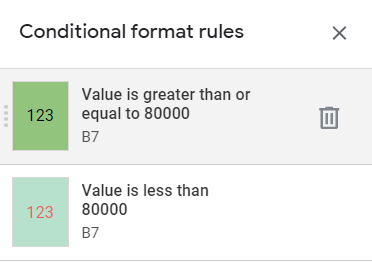
- Let’s say we want to apply a certain format to the result of our computation. We want to fill the total sales with green color if it has reached our target sales, which is $80,000. Otherwise, we’ll highlight it with red color.
We can achieve this through conditional formatting. Create two conditional formatting rules which implement these rules, respectively:- If the value is greater than or equal to 80,000, fill the cell with green
- If the value is less than 80,000, fill the cell with red
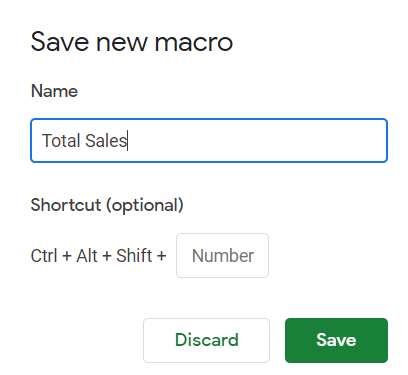
- Once the conditional format rules have been defined, we can already save our new macro. Click the Save button on the recording menu and name the new macro as ‘Total Sales’.
Great! Now you know how to record a macro. In the next section, you will learn how to use the recorded macro to automate tasks in Google Sheets.
How to Run a Macro in Google Sheets
Earlier, we recorded our actions and saved them as a macro. Assuming that we need to perform the same set of actions to the remaining records of our spreadsheet, we just need to run the saved macro to automate the whole process. Here’s how to run a macro in Google Sheets:
- First, select the cell where you want to run the saved macro. In the example below, we selected cell C7.
- Next, click the Extensions menu and select Macros.
- Under Macros, you’ll see a list of recently saved macros. Here, choose the macros you need to implement on the selected cell. We named our macros earlier as ‘Total Sales’, so click it from the list.

- Upon clicking, you will notice that Google Sheets will replicate your earlier actions. It will automatically compute the total sales and apply the appropriate conditional formatting.
Thanks to the Macros feature, you can now automate repeated tasks in Google Sheets. This time, try to use the same macro for the remaining fields.

Macro Shortcuts in Google Sheets
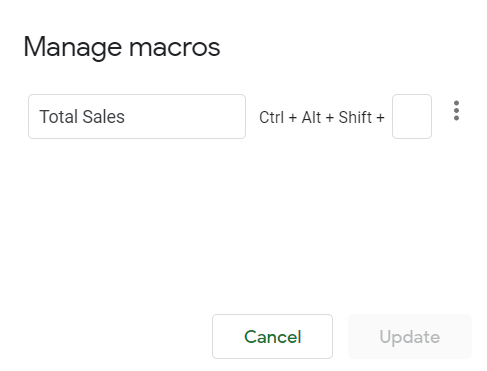
When you save a new macro, you’ll see an optional setting called Shortcut. Here, you can set your own hotkey for the macro you have created. A shortcut lets you instantly run your macro by pressing only a specific combination of keys on your keyboard. You can also assign shortcut keys to existing macros through the Manage macros option under the Macros feature.
There you have it! You just learned all there is to know about macros in Google Sheets. Do you have a spreadsheet that has tasks you want to automate? Then go ahead and try using macros.
Learn more tips by checking out our other articles about Google Sheets.
Don’t forget to subscribe to our newsletter to receive more useful articles like this one about Google Sheets.