This is the ultimate guide on how to use the TEXTSPLIT function in Excel.
The rules for using the TEXTSPLIT function in Excel are the following:
- We need to use an array constant when there is more than one delimiter in the function. For instance, we can input {“,”,”.”} to split the value or text by a comma and a period.
- The
TEXTSPLITfunction is case-sensitive. So we need to be careful when inputting the text values.
Delimiters are used to mark or signal the end of a piece of information and the beginning of another or new part of information. For example, the most common delimiters are the comma and colon.
So the TEXTSPLIT function is a valuable tool in Excel that allows us to split any string into an array across different columns and rows depending on the delimiting characters we input in the function.
And the TEXTSPLIT function can be compared to the Text to Columns tool we can find on the Data tab. But, the Text to Columns tool is not as dynamic as the TEXTSPLIT function meaning the results do not automatically update once the source material is changed.
Aside from the fact that the TEXTSPLIT function addresses those issues, it also returns some amazing results once paired with other functions.
Let’s take a sample scenario wherein we will use the TEXTSPLIT function.
Suppose you received a file containing a string of numbers inputted in one cell. And you were tasked to input each number into separate cells or into an array. If it were a really long string of numbers, it would take too much time to type all the numbers individually.
So you opted to use the TEXTSPLIT function which makes the work faster and more efficient.
Great! Before we learn more, let’s first understand how to write the TEXTSPLIT function.
The Anatomy of the TEXTSPLIT Function
The syntax or the way we write the TEXTSPLIT function is as follows:
=TEXTSPLIT(text, col_delimiter, [row_delimiter], [ignore_empty], [match_mode], [pad_with])
Let’s take apart this formula and understand what each term means:
- = the equal sign is how we start any function in Excel.
- TEXTSPLIT() is our
TEXTSPLITfunction. And this function splits text into rows and columns using delimiters. - col_delimiter is a required argument. And it refers to the text we want to split into columns.
- row_delimiter is an optional argument. And it refers to the specific characters or strings we need to split into rows.
- ignore_empty is another optional argument. So it refers to whether we want to ignore empty cells or not. If we input TRUE, the function will ignore empty values. If we leave input FALSE, the empty values will be preserved. And the default is FALSE.
- match_mode will search the text for a delimiter match. And this is case-sensitive, meaning a match is done by default. Additionally, this is an optional argument. So inputting 0 means enabling match_mode, and 1 means disabling match mode.
- pad_with is an optional argument. And it refers to the value to use for padding. If left blank, #N/A is used by default.
Awesome! Now that we have learned the syntax of the TEXTSPLIT function, let’s dive into a real example of using the TEXTSLPIT function in Excel.
A Real Example of Using the TEXTSPLIT Function in Excel
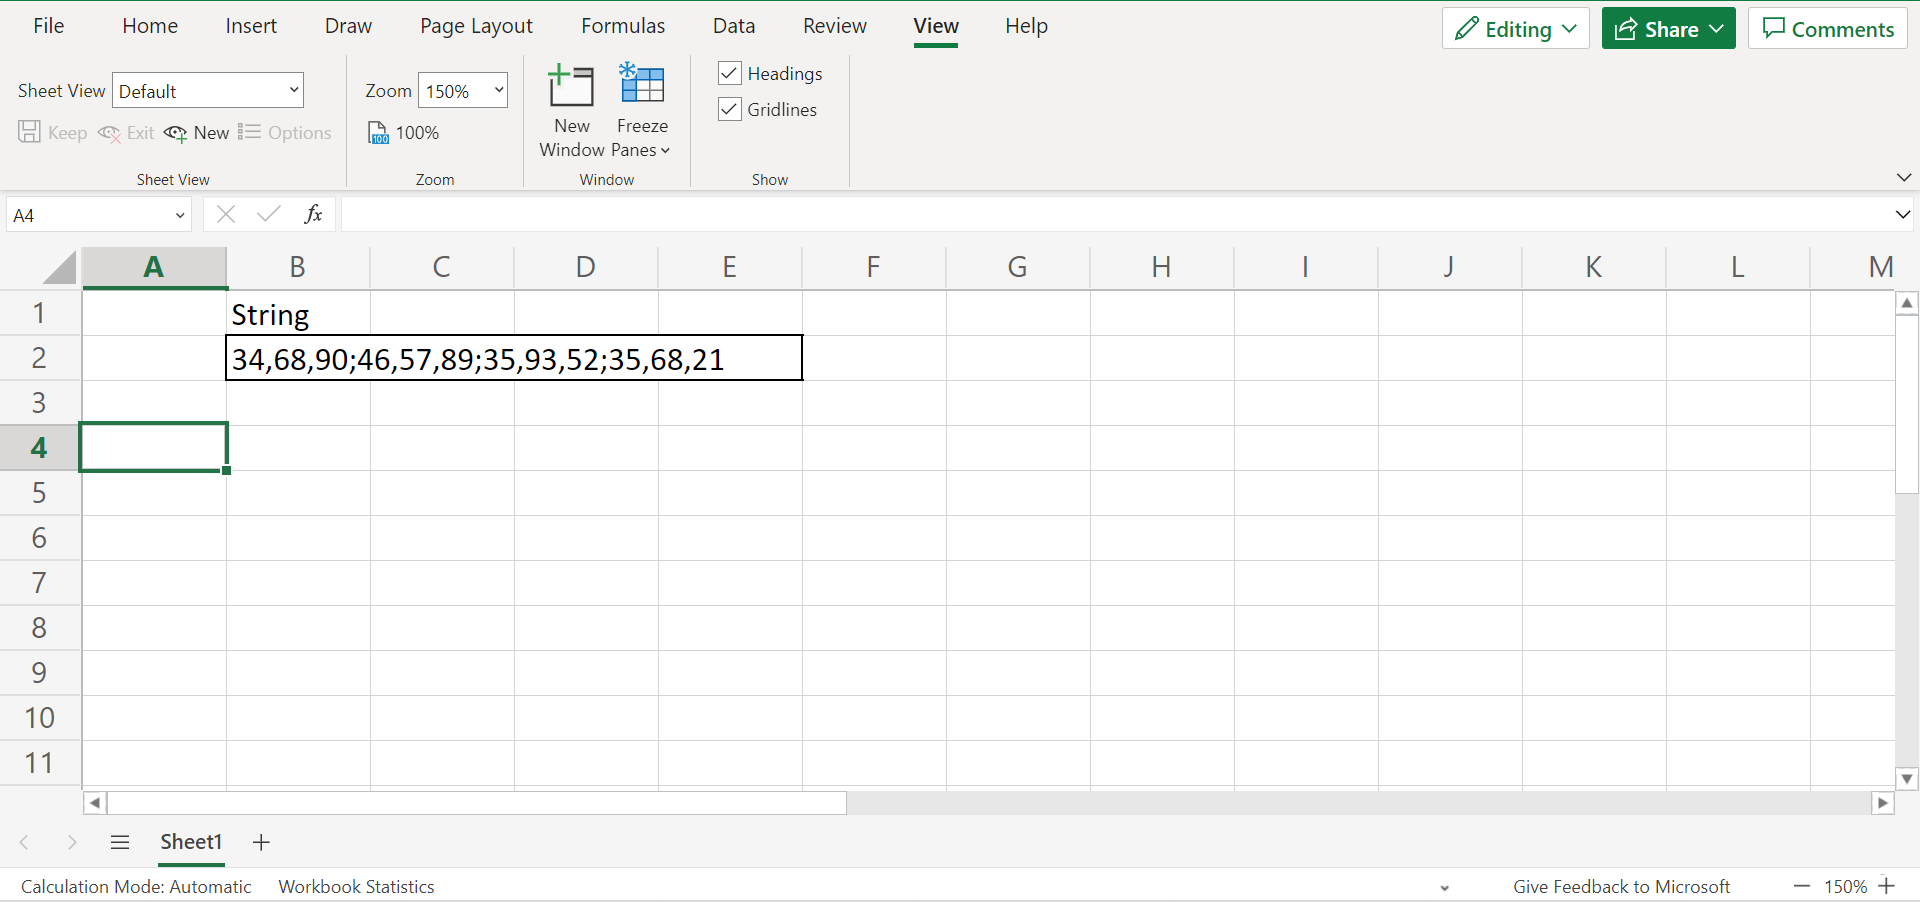
Let’s say we have a data set containing a string of numbers inputted in one cell. And we want to separate the string of numbers and arrange them into an array by columns and rows. So our initial data set would look like this:
But, manually performing this task would take too much time and effort especially given a long string or large data. So it is more efficient to utilize the TEXTSPLIT function to split the string of numbers. Furthermore, we can also use multiple delimiting characters to split our string of numbers.
If our results contain #N/A errors, we can remove them using the IFNA function. So the IFNA function will return a value we specify when the results contain a #N/A error. And we can also pad each value in our array with any string. For example, we can pad a single space character for each value in the array.
Additionally, we can use the TEXTSPLIT function to split dates if needed with the help of the TEXT function. Since dates in Excel are essentially just numbers, we first need to convert them into text and then split them.
Finally, our final data set would look like this after successfully using the TEXTSPLIT function in Excel.

You can make your own copy of the spreadsheet above using the link attached below.
Then, let’s move on and learn the steps on how to use the TEXTSPLIT function in Excel.
How to Use the TEXTSPLIT Function in Excel
In this section, we will discuss the step-by-step process of how to use the TEXTSPLIT function in different situations.
1. Firstly, we need to start the TEXTSPLIT function. So select a cell where you want to input the results. And type an equal sign and the function to begin. Then, simply select the cell containing the string we want to split and input the necessary arguments.
In this case, the entire formula would be “=TEXTSPLIT(B2, “,”, “;”)”. Lastly, press the Enter key to return the results.

2. And tada! We have successfully used the TEXTSPLIT function in Excel.

3. Furthermore, let’s learn how to remove possible #N/A errors from the results. Firstly, we need to combine the TEXTSPLIT function with the IFNA function. For instance, we want the possible #N/A values to return as “”. So our entire formula would be “=IFNA(TEXTSPLIT(B2, “,”, “;”, TRUE), “”)”.
Then, press the Enter key to return the results. If there were #N/A errors in the results, they would return as “” in the array.
4. Next, let’s learn how to pad each value with a given string. In this case, we want to input a single space character. So our entire formula would be “=TRIM(TEXTSPLIT(B2,” “,”.”,TRUE,” “))”. Lastly, press the Enter key to return the results.

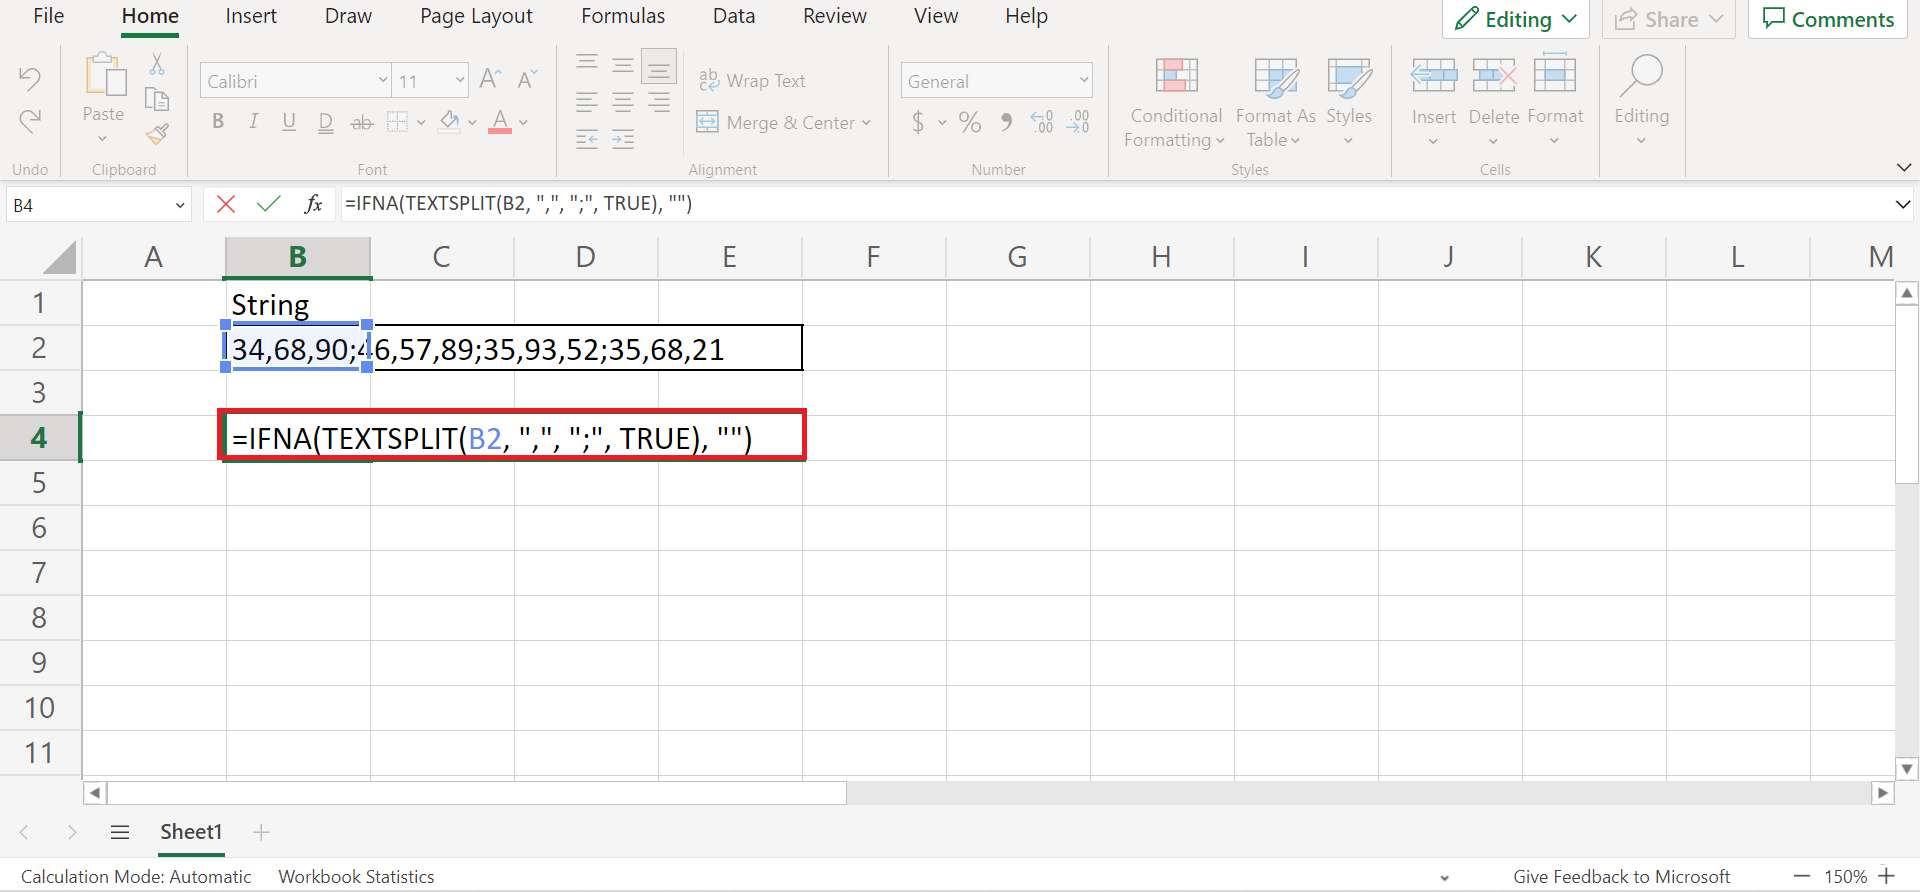
5. Additionally, let’s learn how to split dates. Firstly, we need to turn the dates into text using the TEXT function. Then, we can begin to split them. So our entire formula would be “=TEXTSPLIT(TEXT(G2, “mm/dd/yyyy”),”/”)”. Lastly, press the Enter key to return the results.
6. And tada! We have successfully split dates using the TEXTSPLIT function.
And that’s pretty much it! We have explained how to use the TEXTSPLIT function in Excel in different situations. Since you have learned how to use the TEXTSPLIT function, you can now apply this to your work whenever you need it.
Are you interested in learning more about what Excel can do? You can now use the TEXTSPLIT function and the various other Microsoft Excel formulas available to create great worksheets that work for you. Make sure to subscribe to our newsletter to be the first to know about the latest guides and tutorials from us.